MyCED for Initial Teaching Credential Students
Access the system at https://csulb.edu/myced
Login with your CSULB SSO and authenticate as normal.
The first time you log in, click accept to grant permission for the system. This is a one-time acceptance
Directions for Prerequisite Document Uploads
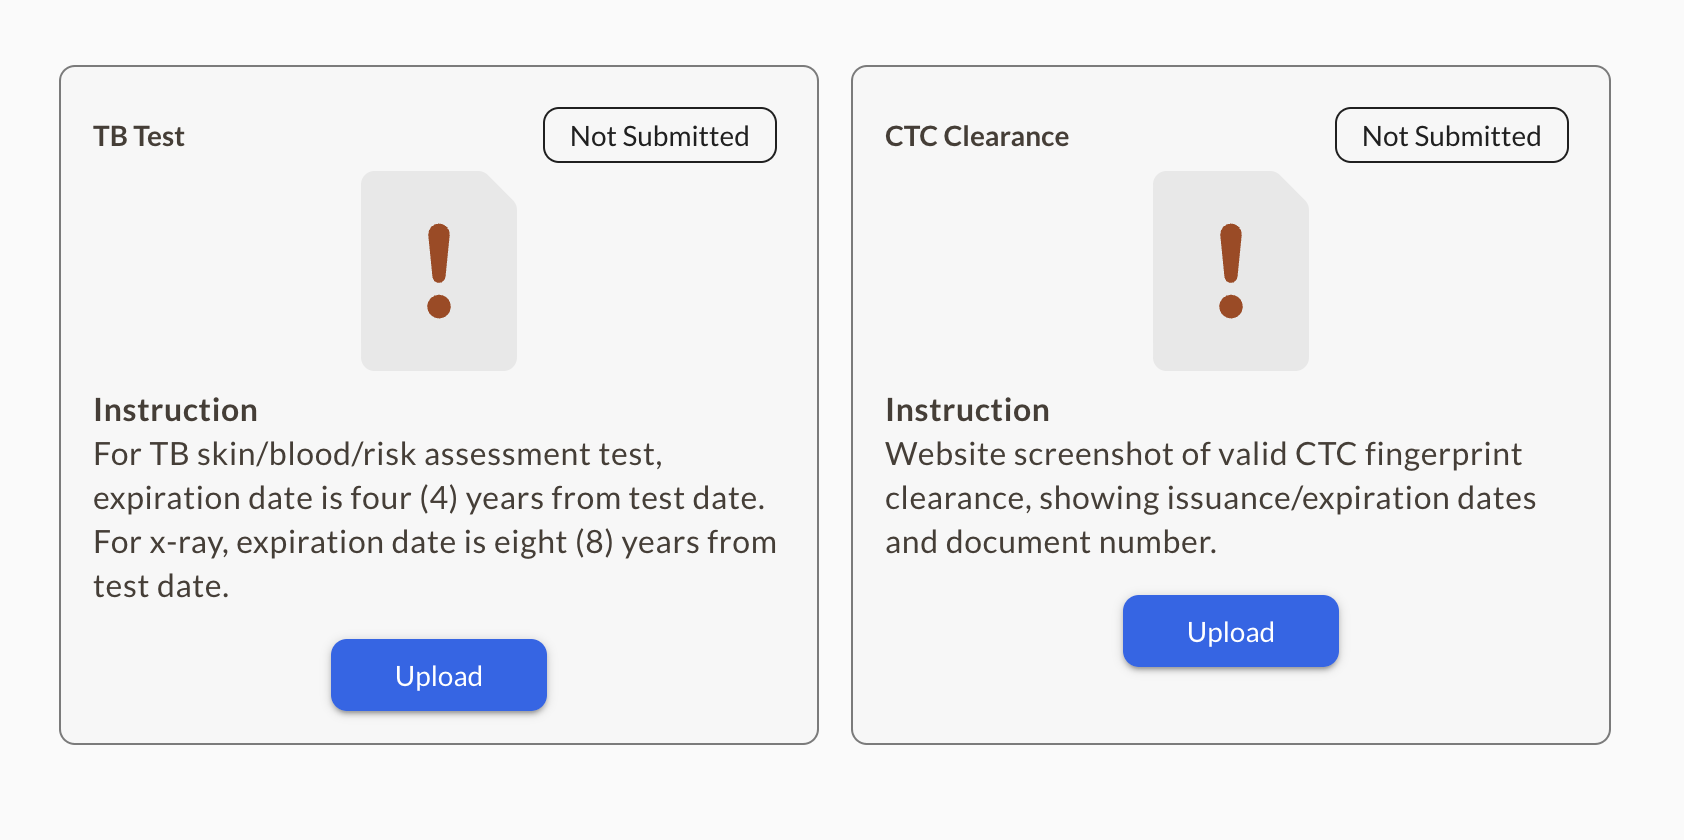
Click on the tile for field work and clinical practice.

Click on one of the courses to view the required documents, which include a TB test and CTC clearance.

As you may know, both documents are required in order to meet the prerequisites for field work. You only need to upload each document once. It will apply to each course that requires it.
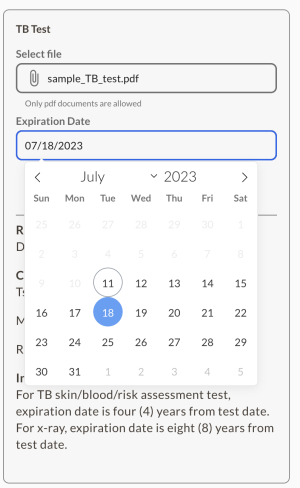
Click on the upload button for and select your file from the file browser. Please note that only PDF documents are allowed.

Adjust the expiration date. For TB skin/blood/risk assessment test, expiration date is four (4) years from test date. For x-ray, expiration date is eight (8) years from test date. For the CTC Clearance, the expiration date is indicated on the document.

Repeat the process for the second document or return at a later session to upload the next document.
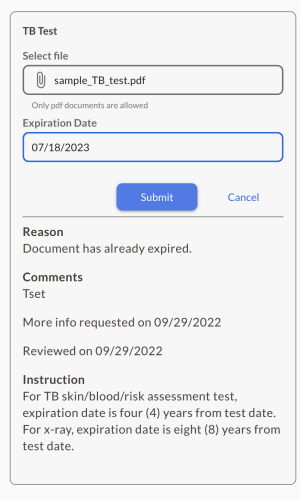
Please click submit, and our team will be notified to review your documents.

Notifications
You will receive an email notification when your documents have been approved. When both documents are approved, you will receive the official letter to take to your school site for field work placement. Thank you! Good luck with your field work this semester!
Converting a file, such as a JPG or PNG to PDF, on a Mac
- Open the Preview app. This is the included application on all Macs. Find and open the relevant file.
- Choose File > Export.
- Click the Format pop-up. Choose PDF as the file type.
- Rename and save. Change the name and/or select a different location to save down your new PDF.
Converting a file, such as a JPG or PNG to PDF, on a PC
- Open the file you want to convert. Your computer will open it with its default viewer. (With Windows, this should be the Photos app.)
- Click CTRL+P to bring up the Print dialog box.
- Click the Printer icon to open a drop-down list.
- Select Microsoft Print to PDF.
- Click Print. (This won’t actually print your document, but instead prompt the File Explorer dialog box to open.)
- In the new dialog box, your document now has the PDF file extension. Choose where you want to save this file as a PDF and click Save to finalize.
A website screenshot of valid CTC fingerprint clearance, showing issuance/expiration dates and document number is required for your upload document.
Here are instructions on how to access the correct document to upload:
- Visit the California Commission on Teacher Credentialing
- Click on "Search for an Educator"
- Click the "Secured Search” link to enter your SSN and DOB to access more detailed credentialed information.
- Click on your document number of your CTC Clearance
- Select Print and instead of printing, on a Mac use the options to Save as PDF, or on a PC Select Microsoft Print to PDF.
No, once you have added the documents to one course, they will automatically be added to all courses.
As long as the documents have not expired, you will not need to reupload them each semester. The document approvals will still be active in MyCED.
Please allow one week for course adds and drops to become active in MyCED.
Reporting Clinical Practice Hours in MyCED
If your supervisor is not on the list, select "Other". This will prompt two new fields to appear where you can enter your supervisor's name and email.
In the Activity Log tab, enter the Activity Details per the regular process, and click Save.
After clicking Save, a "Send Mail" button will send an email to the Demonstration Teacher/Site Supervisor indicated on the Activity Details. The system will not automatically send out the approval emails. This process must be initiated by the student when you are ready to have logs approved.
Important to Note: This email will send all pending activity logs for approval, not just the one selected. If the Demonstration Teacher/Site Supervisor works with multiple students, the link will provide access to those students' logs too. The Demonstration Teacher/Site Supervisor only needs the email once. The link will be the same when more activity logs are added.
What happens if my Demonstration Teacher/Site Supervisor does not get the email or specific logs? Check if the email is typed correctly. Each log is independent, so if the email is not typed correctly on one of the Activity Log Details, it will not appear on the list. Click edit to correct the email and then click the Send Mail button again.


