Kaltura Canvas
Kaltura is a cloud-based platform integrated into Canvas for creating, sharing, and managing media files.
All media uploaded to Canvas is stored in the "My Media" area of your account. My Media is specific to each user and is a private repository for your media files. Media can be published to an individual course's Media Gallery, embedded in course Modules, added to Pages and even submitted as Assignments.
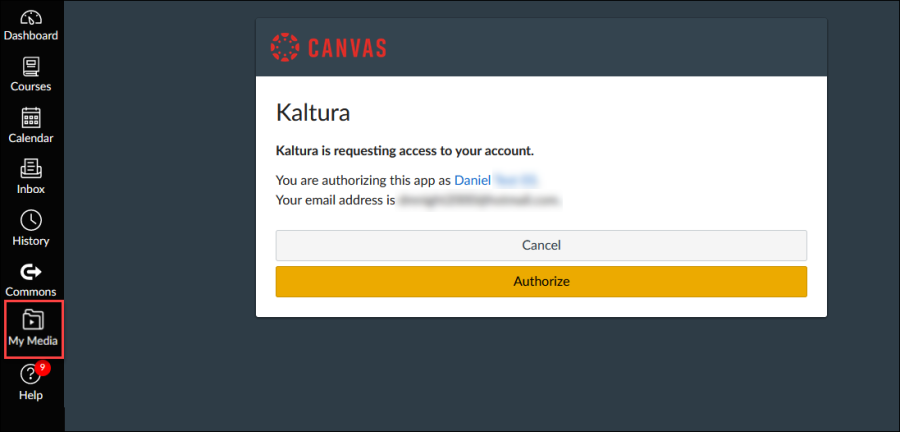
To access your My Media repository, click on the My Media icon from the global navigation menu.
First time users will need to Authorize access to Kaltura after clicking on My Media from the Global navigation menu.
The Media Gallery is where course-specific media is housed that is visible to instructors and students enrolled within the course. Teachers and Teaching Assistants can upload media items to the Media Gallery, publish them from My Media, or import a Media Gallery from other courses.
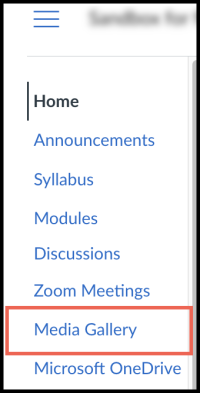
To access your course Media Gallery, click on the Media Gallery link from your course navigation menu.
Note: To upload Zoom Cloud recordings to My Media, download the recording to your computer. Then follow the steps below to upload the file.
On the My Media page, click the Add New button and then Media Upload.
Image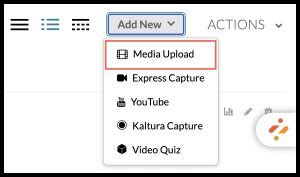
Drag & Drop or Choose a file to upload, locate the file on your computer.
Image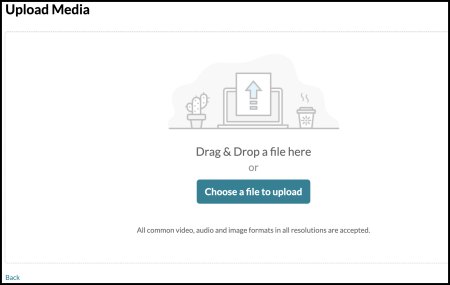
Kaltura will display a progress bar as the file uploads. Once the media has been uploaded, you have the option to update the Name (1), Description (2), Tags (3) or Publishing Status (4).
Image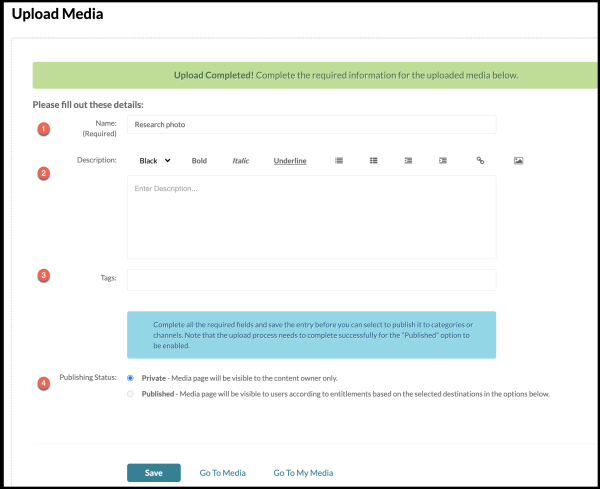
Kaltura Express Capture enables recording content directly from a browser without the need to install any additional software. The Kaltura HTML recorder allows you to use your webcam or audio devices to record video and audio entries directly from your browser. You can create an Express Capture video in both My Media and Media Gallery.
- In your media page, click the Add New button and select Express Capture.
- (Optional) Set the Camera or Audio Settings. The default settings are your personal computer's webcam and audio device.
- Click on the red Record Button to start the recording. A three second countdown will appear before the recording begins.
- Click the Stop Button to end the recording.
One the recording ends, you have the option to Record Again(1) to retake the recording, Download a Copy locally to your computer (2), and Use This (3) to save the recording.
Image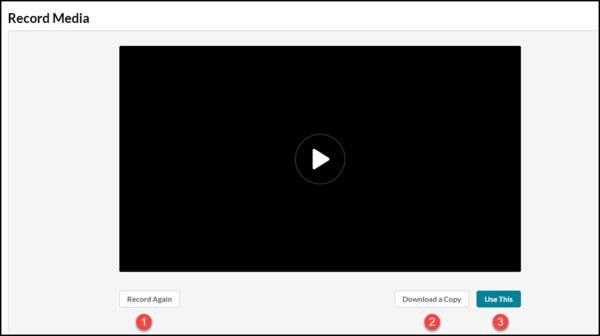
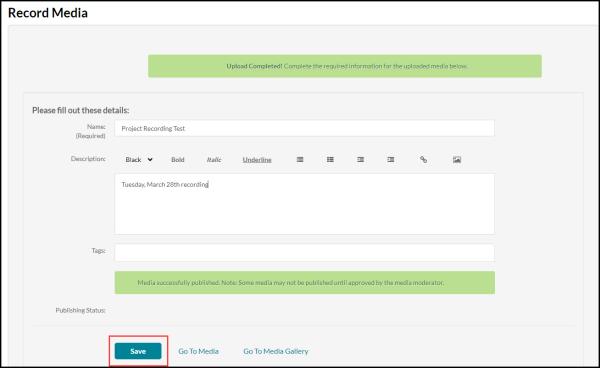
- After the upload is complete, you have the option to update the Name, Description, or Tags.
- Click Save.
YouTube videos can be added to your My Media repository to share within your courses.
Note: Only public YouTube videos can be added to your My Media.
Click on Add New in the top right corner. Select YouTube from the dropdown menu.
Image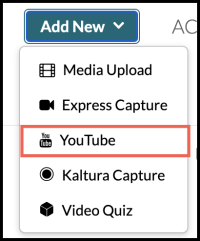
- Copy the shareable YouTube video link and paste in the Video Page Link text box (1).
Click Preview (2) to see an embedded preview of the imported video (3) along with the video details.
Image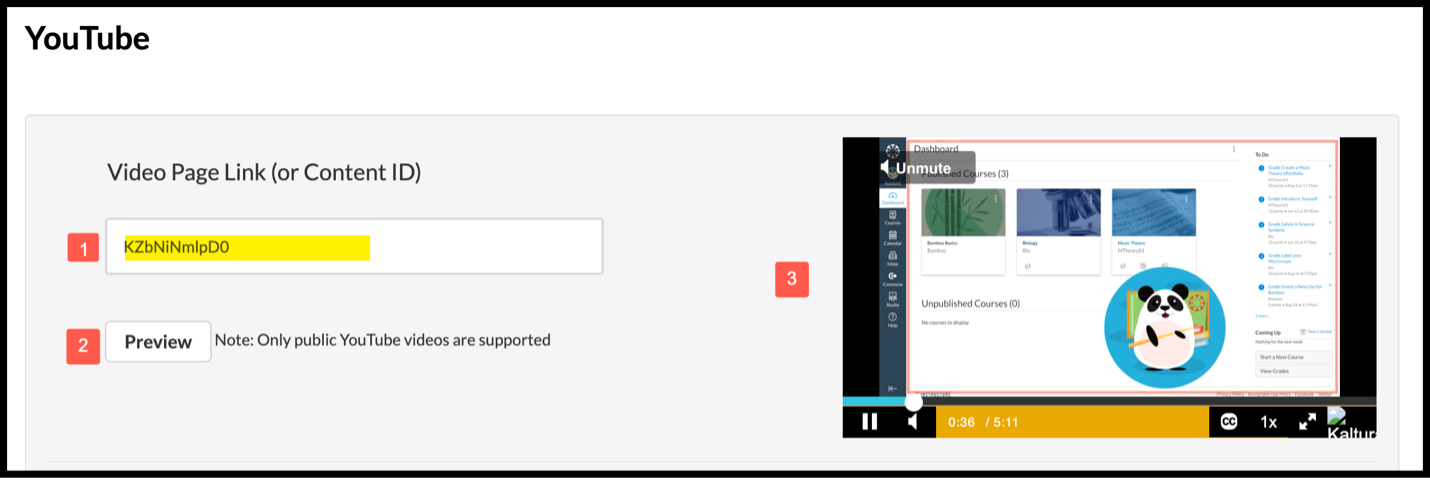
- Scroll down to modify the video details such as to edit the Name, change the Description, add Tags, or set the Publishing Status.
Click Save when all the changes have been made.
Image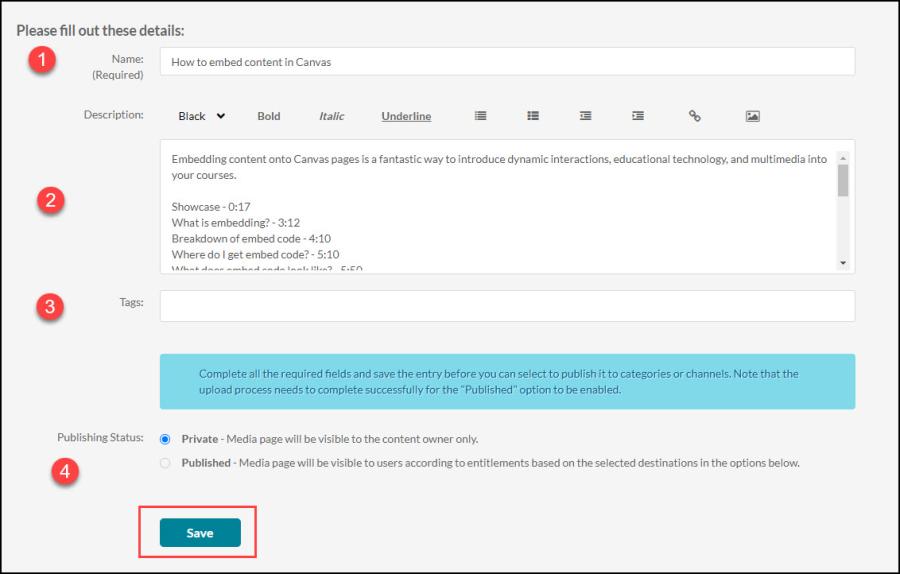
* Kaltura Capture is not available in the Media Gallery
Kaltura Capture is a desktop recording tool to create videos by screen recording. Kaltura Capture can be used for creating demos, tutorials, lecture videos, and other screen recording activities. Kaltura Capture is supported on both Windows and Mac and all captured media can either be uploaded to My Media or saved locally on your personal device.
In the My Media page, click the Add New button and select Kaltura Capture.
Image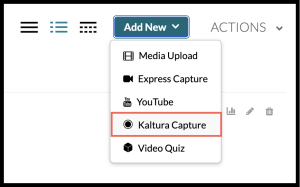
If using Kaltura Capture for the first time, click on the download link for your computer (Windows or Mac) at the bottom of the screen. If you’ve already installed Kaltura Capture, it will launch automatically. For further instructions on how to install Kaltura Capture on a Mac or Windows, visit the support page on Kaltura Capture.
Image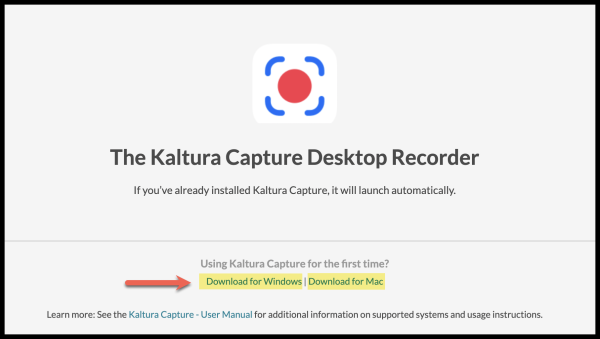
Once the Kaltura Capture Desktop Recorder is launched, click the red button to start recording.
Image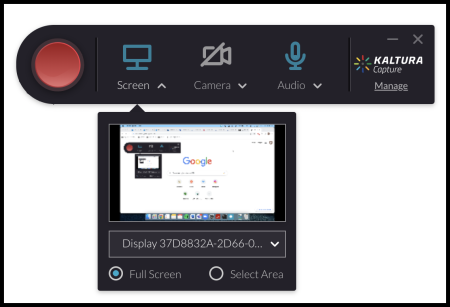
Here is a view of the recording tool when minimized:
Image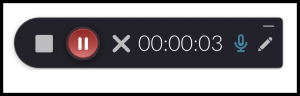
- Stop recording button (gray square): Once you Press to stop the recording. You will be prompted with a confirmation box.
- Pause/Resume recording button
- Cancel recording button (gray X): discards the current recording
- Elapsed time
- Minimize interface icon
- Pencil icon to open the whiteboard
- Once the recording is completed, you will be directed to the entry page where you can enter the Title, Description, and Tags.
Click Save to store recording locally on your device or Save & Upload to upload to My Media.
Image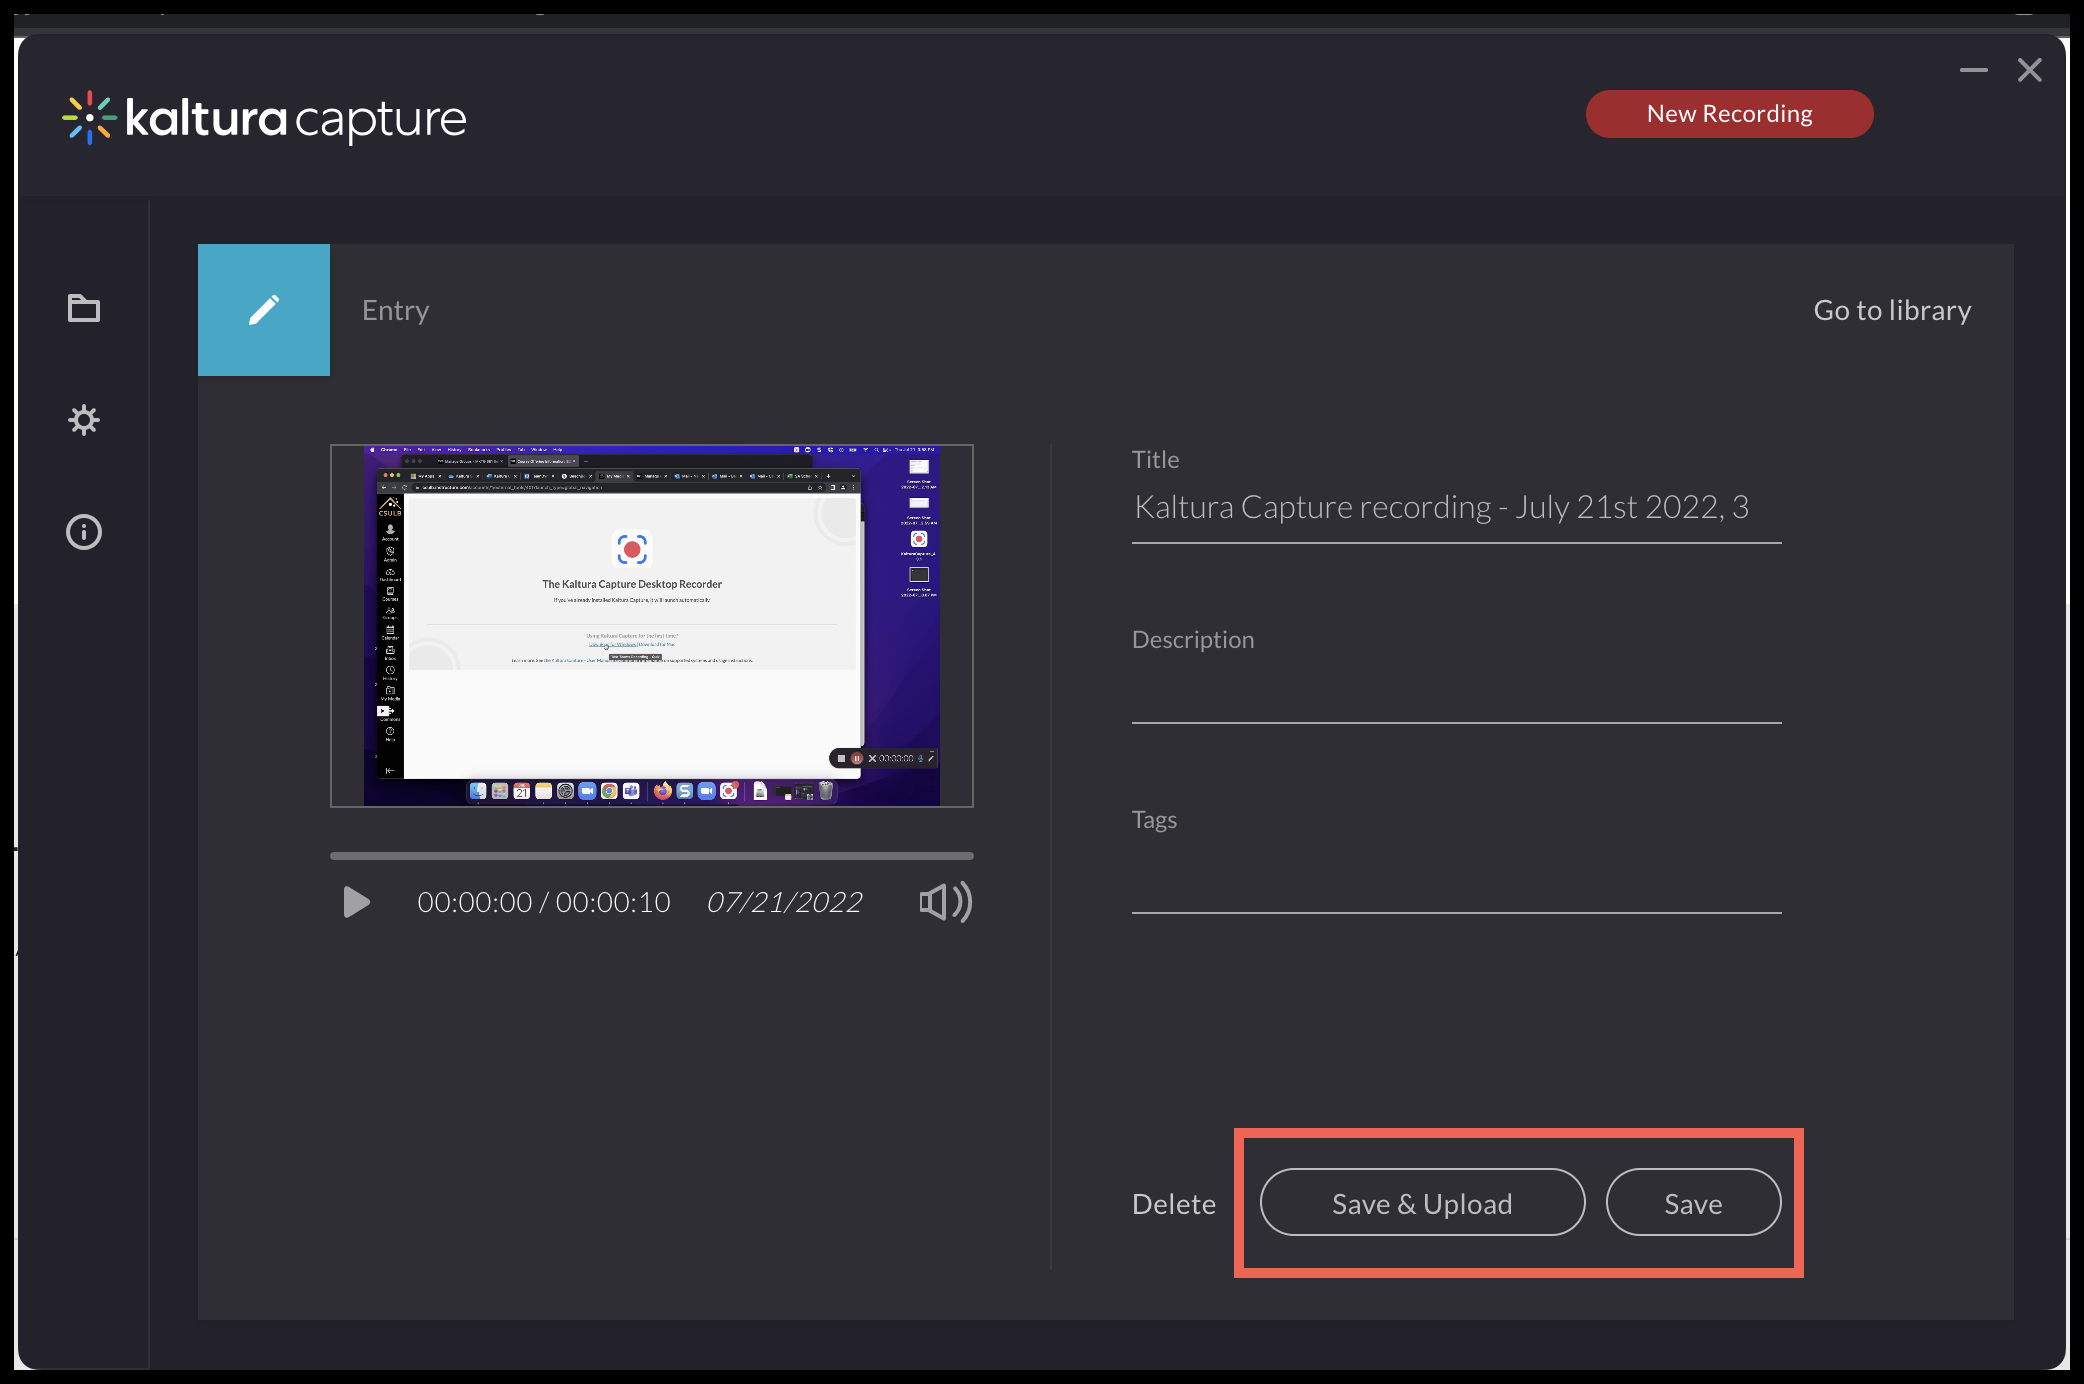
When developing and implementing video assessments, consider the following elements to maximize this learning activity:
- Determine if the video quiz is either self-directed formative learning or summative assessment activity.
- Create engaging video quizzes by incorporating frequent interactions throughout the video appropriate for its length and all the way to the end, not only at the beginning or end.
- The best practice for video engagement is to keep videos short, ideally less than 6-minutes in duration.
- Incorporate your talking head with slides rather than slides alone.
- Create or include videos with a more personal feel as this is more important than its production quality.
For more on video assessment best practice and recommendations, review page 2 of this MIT large-scale empirical study.
Kaltura's Video Quiz feature is an effective learning tool that allows you to seamlessly embed interactions such as a reflection point, multiple choice, true/false and open-ended questions, at any time in a video, including YouTube videos.
Each question will appear at its chosen point on the timeline, and the video will continue playing after each question is viewed and/or answered. As faculty, you have the option to grade this activity, provide all interactions as a Pre-test download, prevent fast-forwarding, allow learners to repeat and/or skip questions, revise answers, receive hints and receive immediate feedback based on your correct answer rationale.
To create a video assessment activity for an existing YouTube video within your Kaltura account, follow the instructions below after accessing your Canvas My Media tool:
Select Add New to invoke the menu and select Video Quiz.
Image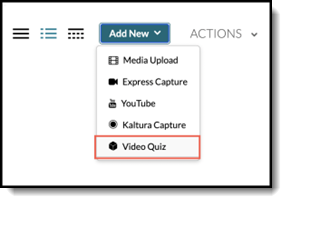
Displayed are all eligible videos for assessment activity. After identifying the desired content, choose the Select button to the right of that video.
Image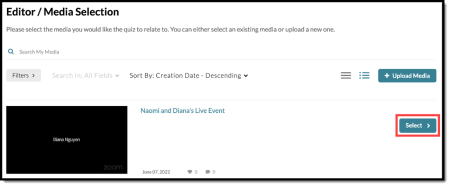
- On the Quiz Editor page, select the Play button to preview the video and select Pause (1) to insert a question at the time stamp.
To insert a question after pausing, select the Add a Question (2) button. Question types available for Video Quizzes are: Multiple Choice, True/False, Reflection Point, and Open-Ended Questions (3).
Image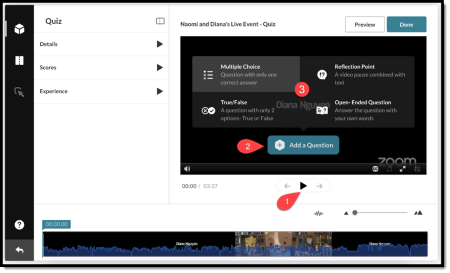
- Note: Only Multiple Choice and True/False questions are automatically scored. Review Formative best practices section for details.
- Note: Only Multiple Choice and True/False questions are automatically scored. Review Formative best practices section for details.
Enter your question text (1) and elect correct answers (2). For multiple choice questions, you can generate two additional choices for a total of four (3). Then select Save (4). The new question will appear on the timeline at the bottom of the Quiz Editor (5).
Image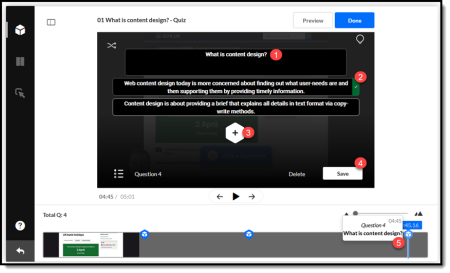
Note: Multiple choice, True/False and Open-ended questions allow you to provide either a hint and/or a given rationale for the correct answer. To enter this information, select the lightbulb icon (1) to reveal both options (2).
Image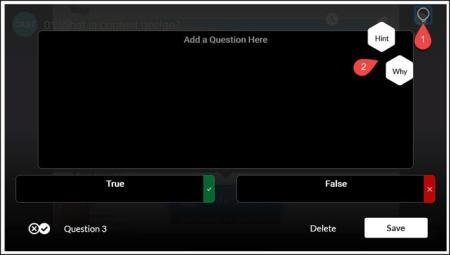
On the left side of the Quiz Editor, select Details (1) to edit the name and description of the quiz (annotated area), Scores (2) to adjust score visibility, and Experience (3) to allow for answer modifications.
Image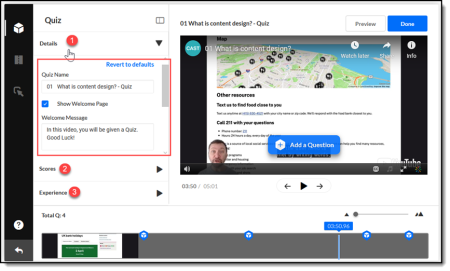
- Select Done to complete your quiz.
The video quiz will appear in My Media as a new copy of your original content.
When creating a video assessment as formative learning activity, consider the following:
- Creating opportunity for low-stakes, self-directed learning (best when graded at best attempt).
- Automatic scoring is only possible with Multiple-choice & True/False questions as these have definitive answers allowing for accuracy in grading.
- Allow to download video interactions as 'Pre-test.'
- Enable students to skip through the video for interactions.
- Reflection point questions are optional as they require no assessment and have no grade impact.
- Does not require human-assessment for feedback.
- Utilize Hint & Why features to help reinforce concepts & correct answer rationale (immediate feedback).
When creating a video assessment as a summative learning activity, consider the following:
- Create timed/proctored knowledge-check opportunity for mid-term or final assessment.
- Incorporate a mix of open-ended, multiple-choice & true/false questions.
- Do not allow downloading video interactions as 'Pre-test.'
- Requires that learners must watch the entire video for submission.
- Does not include reflection questions as these cannot be assessed.
- Requires manual assessment for grading.
- Immediate feedback optional to provide opportunity for open-ended question assessment.
Note: When grading for summative assessments, open-ended questions require accessing video analytics to review student attempt information. Review next section for details.
By default, all Kaltura video quizzes start as ungraded activities. To formally grade video quizzes as learning activities, this content must be created using the Canvas Assignment tool, but only after you've created either formative or summative video interactions.
Review the steps below for instructions on creating such a graded assignment:
- Select the Canvas Assignment tool (1) and identify the appropriate assignment group (2).
Select the plus "+" icon (3) then More Options from the floating menu.
Image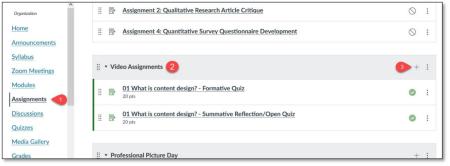
After providing assignment details (e.g. Name & Rich Content Editor instructions, points etc.,), select the Submission Type option to invoke dropdown menu & elect "External Tool."
Image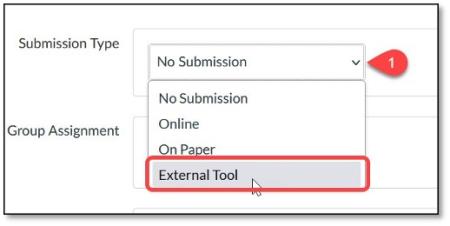
Next, you'll need to Find the existing video quiz you've created to establish the assignment relationship.
Image
From the Configure External Tool pop-up window, first select the Kaltura Video Quiz option (1) where you'll then be re-directed to all available Kaltura-generated Video Quizzes.
Image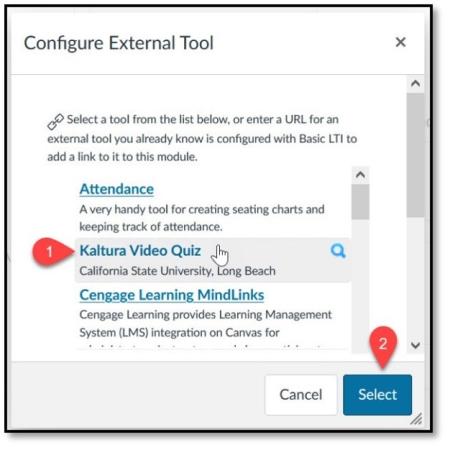
Identify the desired video quiz and select Embed located to the right.
Image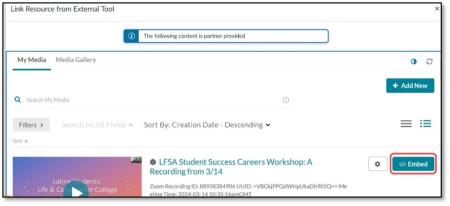
- Lastly, select the Select (2) button to then Save or Save & Publish this assignment.
Beyond capturing standard mediaAnalytics, enabling Video Quiz features provides the ability for quiz creators/media owners and co-editors to view the quiz user analytics from available submissions, known as Userreports. The Userreports is what allows you as faculty to review all answer choices to MC & T/F questions and provides the student submitted text for open-ended and essay-like responses, allowing you to assess as part of a summative learning activity.
To access mediaAnalytics and review Userreports with detailed, unique learner input to your built-in interactions, follow the steps below only after publishing this video quiz within your course Media Gallery:
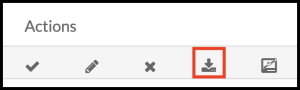
Select Analytics (2) from the Actions (1) drop-down menu.
Image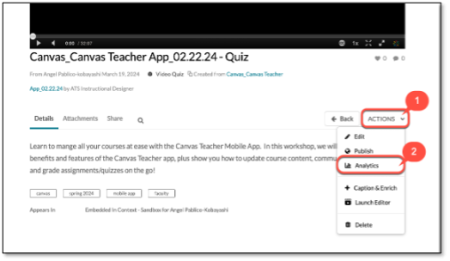
The default date range for available analytics is Last 30 Days. To view the average score for all users in a different time period, use the drop-down menu to select desired date-range for the generation of those analytics.
Image
To view how specific users scored on the quiz, and how many times they took the quiz, click the Quiz Users tab.
Image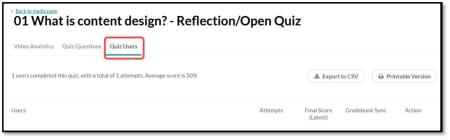
- A report listing all users is displayed with a breakdown for the following values for each user.
- Users- Click on the user's Name to expand for Additional Details.
Additional Details: Select a Username. The table expands and displays the Last Attempt's Results for the user (even if final score is calculated based on first or highest score for example).
Image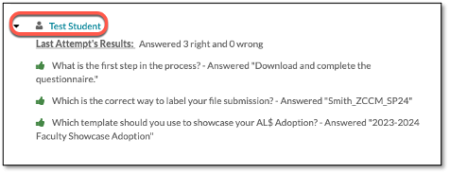
- Attempts- related to the Multiple Attempts feature.
Allow Multiple Attempts- You can select how many attempts a participant has to take the quiz (the minimum is 2 per quiz). You then choose which score to keep (Highest Attempt, Lowest Attempt, First Attempt, or Average of all Attempts).
Image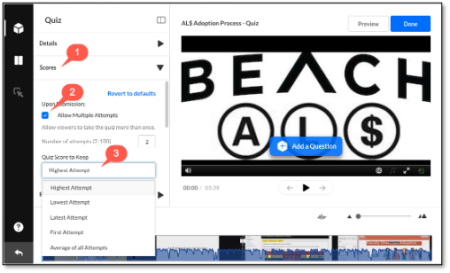
- Final Score- displays the final grade for each user.
- Note: If Multiple Attempts is not enabled on the quiz, the "Final Score" will be displayed as the user's final score.
Gradebook Sync- After a student completes a quiz. their score is reported to Canvas Gradebook and denoted by the Success or Error status displayed in the corresponding column.
Image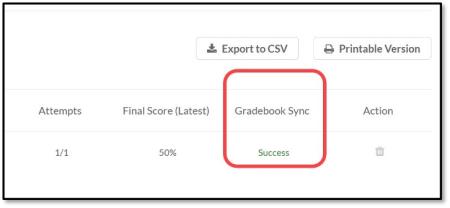
- Action- You may remove a user's last attempt. When you remove the last attempt, the user's last submission is removed and the user will be allowed to take the quiz again.
- Clear all attempts to remove the user's attempts completely and allow the user to take the quiz again.
To remove submissions- click on the Trash can.
Image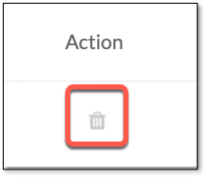
A warning message is displayed:
Image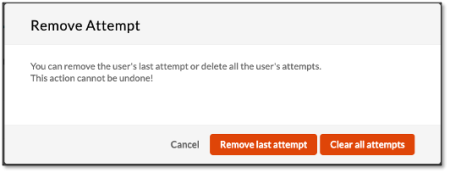
Export to CSV & print options are also available for both the class level (1) and individual submission level (2).
Image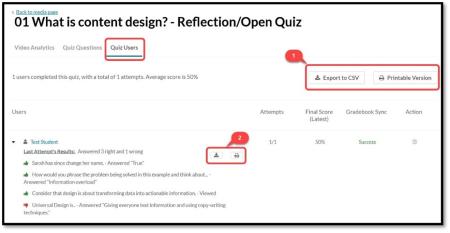
- Users- Click on the user's Name to expand for Additional Details.
To view Student Answers by Quesion, select the Quiz Questions tab. A report with all the questions is shown with a breakdown of how each user answered the question.
Image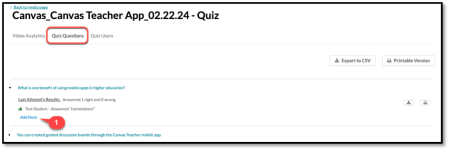
Also available is the ability to Add Note (1). Here you can add a note below each open answer for reviewing later and be advised that the ability to add a note is available for open questions only. To provide, select the desired question, select the Add Note text and enter your comment, then select Add.
Image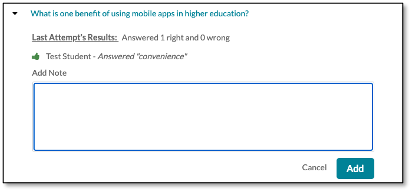
In your list of videos in My Media or Media Gallery, you will see the pencil icon and the trash icon to the right of each video entry. The pencil icon will allow you to edit the video while the trash icon will delete the video from the library.
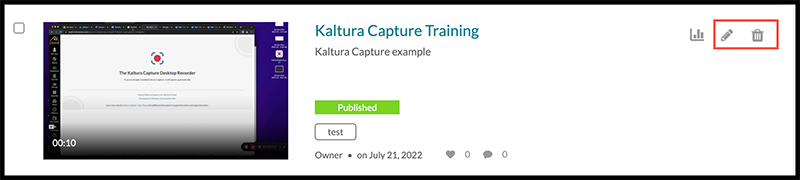
Please note: Deleting a published video from My Media will also remove the video from any course Media Gallery in which it was published.
To edit the details of a media item, click on the pencil to the right of an item.

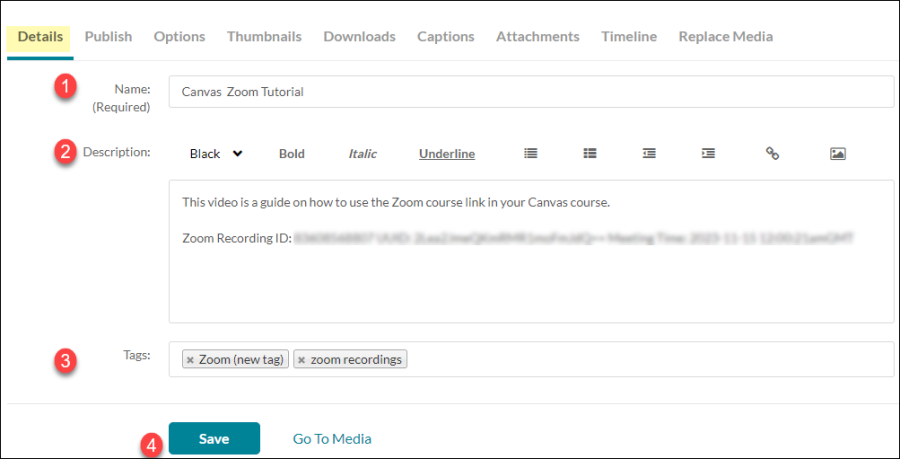
You will automatically be directed to the Details tab. In the Details tab, you can edit the:
- Name (Required)– Any name modifications can be made here. If the media file is a Zoom Cloud Recording, the name will be the title of the Zoom meeting.
- Description (Optional) – Add a descriptive overview of the video. If the media file is a Zoom Cloud Recording, the description will be the Zoom Recording ID and meeting information.
- Tags (Optional) - Add tags to help organize your media content. New tags will be indicated with a “(new tag)” marker.
- Be sure to Save any changes you make.
Automated captioning is generated for uploaded media only. The captions are not always generated with 100% accuracy so it is recommended to edit the captions to make any changes necessary.
**Please note that the time to process and implement captions varies depending on the length and content of the video.
Zoom Cloud recordings, you will need to enable Closed Captioning in the meeting for the automatic captions to transfer over to Kaltura. #1, Click on the pencil to the right of the thumbnail of a media item. ; use the screenshot
Edit Captions
To edit video captions, navigate to My Media or Media Gallery. Click on the pencil to the right of the item to edit it.
Image
Select the Captions tab and then select Edit Captions.
Image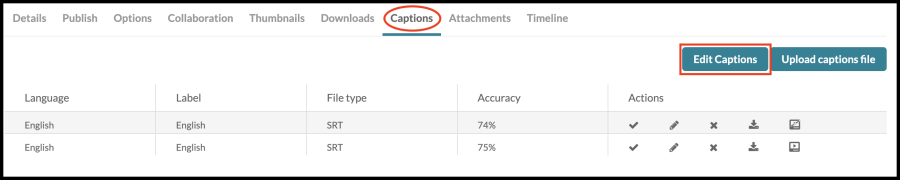
Changes to the captions can be made in the Closed Captions Editor page. Once the changes have been made, click Save before closing the page.
Image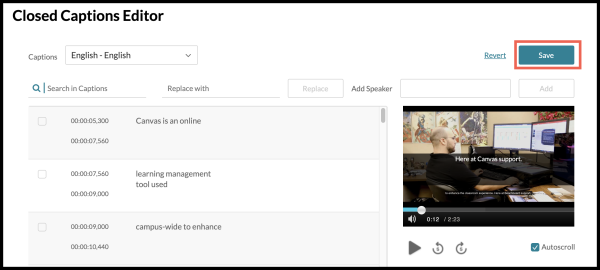
Download Transcripts
Once the captions for a video are generated, you can download a copy of the transcript by clicking the download icon for the specific Caption file .
Media Owner:
You are the Owner of any media uploaded to your personal My Media repository. The change of media ownership to someone else can be useful in cases where the owner is leaving the organization or switching responsibilities and someone else needs to take ownership of the media. To change media owner:
In My Media, edit the media item by clicking the pencil icon to the right of the media thumbnail.
Image
Navigate to the Collaborations tab and select the Change media owner button.
Image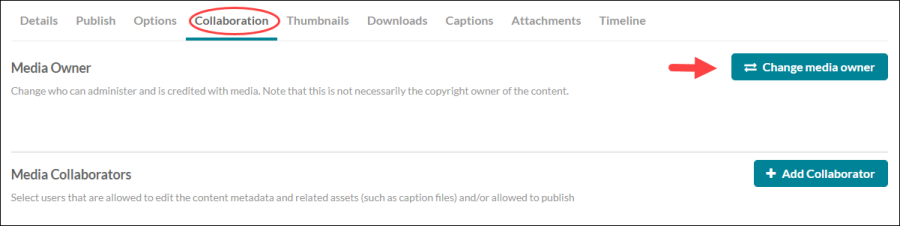
In the Change Media Owner pop up, window, enter the name of the user(s), or campus ID(s), or email(s) within the "Type user or group name" field. Then select Save to apply the changes.
Image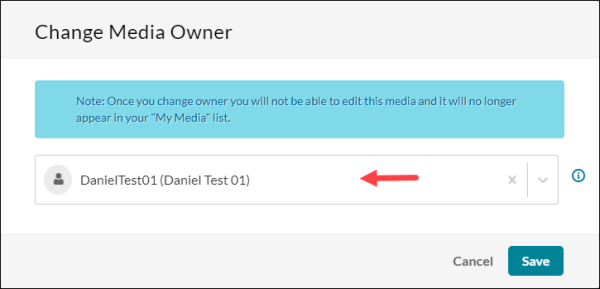
Collaborators:
The Collaboration option allows you to have others modify your media item. The different types of Collaborators are:
- Co-Editors can edit the entry's details, trim media, replace media, edit captions, edit chapters, and edit slides. Co-editors cannot delete media or add new co-editors and co-publishers. Co-editors can also see the analytics page for the media they co-edit.
- Co-Publishers can publish media to their courses’ Media Galleries.
- Co-Viewers are only allowed to view published and unlisted media items. Co-viewers do not have the ability to publish or edit a media item.
To add a Collaborator to a media item:
In My Media, edit the media item by clicking the pencil icon to the right of the media thumbnail.
Image
Navigate to the Collaborations tab and select the Add Collaborator button.
Image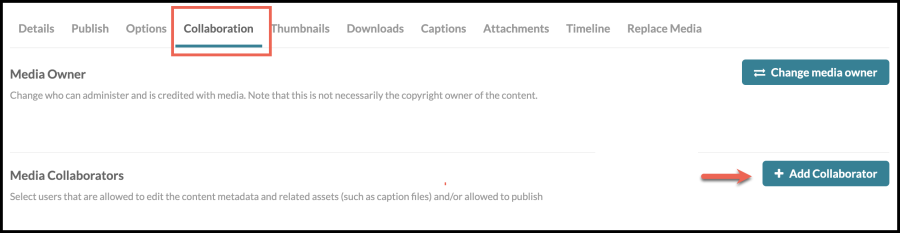
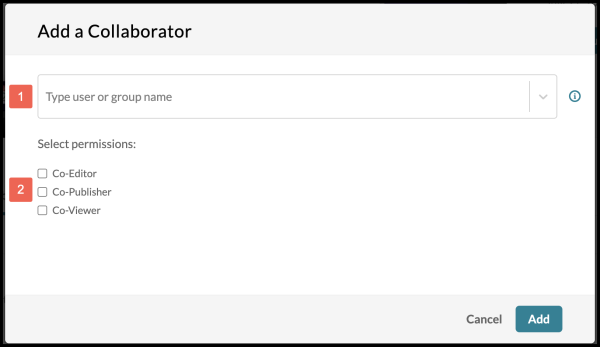
- In the Add a Collaborator window, enter the name of the user(s), or campus ID(s), or email(s) within the "Type user or group name" field. Then select the permissions for the user(s). Lastly, select Add to apply the changes.
On the My Media page, locate the items you want to publish.
For each item you wish to publish, check the box(es) to the left of the thumbnail to select for publishing (1). Then click the Actions button and choose Publish (2).
Image
You will then see a list of courses you are enrolled in. Check the desired classes and click Save. The files will now appear in the Media Gallery for the courses you selected.
Image
You can embed most Kaltura Media files in a Canvas course. This is done via the Canvas Rich Content Editor which applies to Discussions, Announcements, Pages, Assignments, Quizzes, etc.
Select the dropdown arrow next to the extension icon and select View All.
Image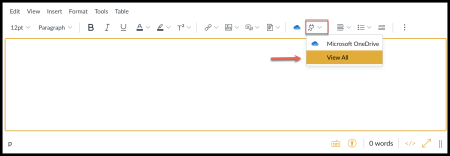
Under the All Apps menu, select the Embed Kaltura Media option, then select Done.
Image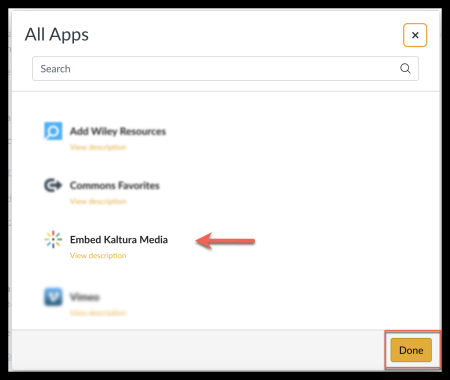
Search or scroll to the video you wish to embed, then select the Embed button.
Image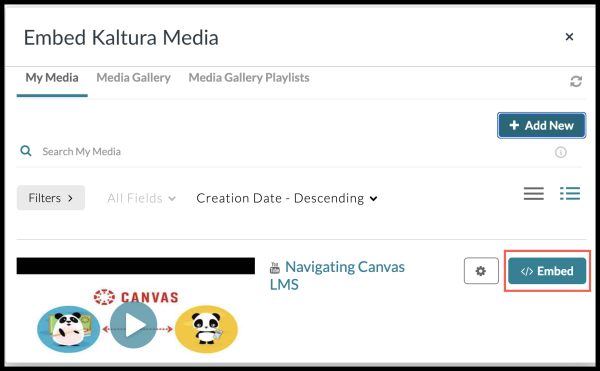
- The video will then populate in the Rich Content Editor.
Kaltura videos can be added to your Canvas course as a Module item when uploaded as an External Tool.
In the Modules page, Click the “+” icon to add a new item to an existing module.
Image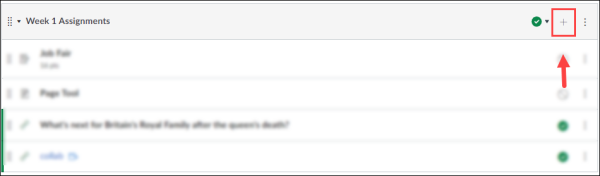
- Select the External Tool option from the dropdown menu.
Scroll down to select Kaltura Video Link as an External Tool then click Add from Library on the "Let’s get started" page.
Image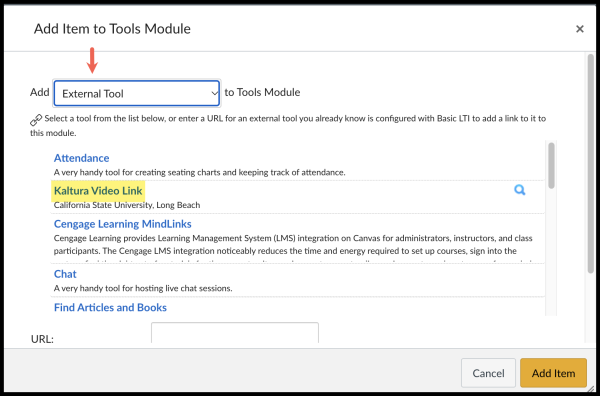
Navigate to the video you would like to add and select Embed.
Image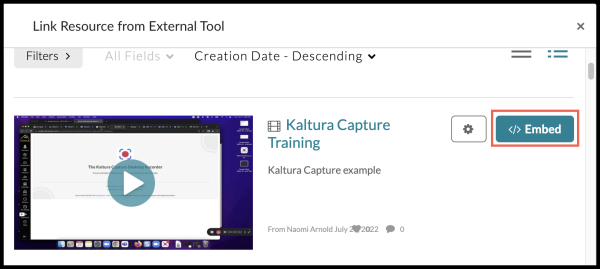
- Once redirected to the External Tool page, select Add Item.
Search in My Media
- Access My Media from the global navigation menu.
- Click on the Search My Media field.
- You can search by file name, ownership, captions, tags, date, etc.
You can also apply Filters to search by Media Type, Publish Status, Ownership, Captions, Duration, Creation Date, and Last Update Date.
Image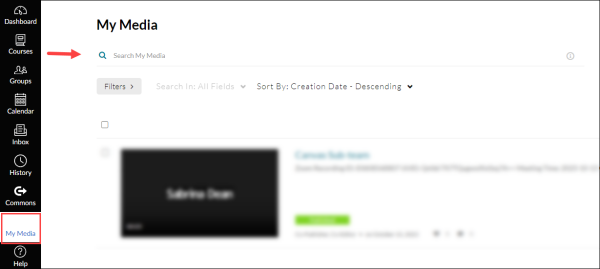
Search in Media Gallery
- In your desired course, click on Media Gallery from your course navigation menu.
- Enter a search term in the Search this gallery field and this will search all fields within the videos.
- You can search my file name, ownership, captions, tags, date, etc.
- You can also apply Filters to search by Media Type, Ownership, Captions, Duration, Creation Date, and Last Update Date
If you are seeing the "Show More" link within your search results, this means that there are possible results within the captions.
Image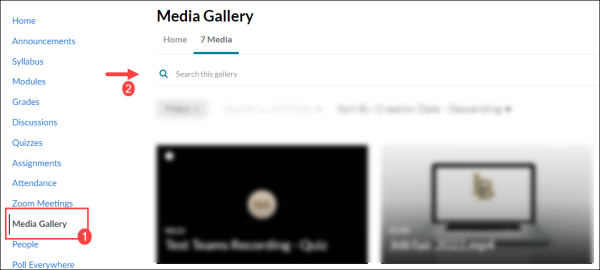
Select Media Gallery from the course navigation menu.
Image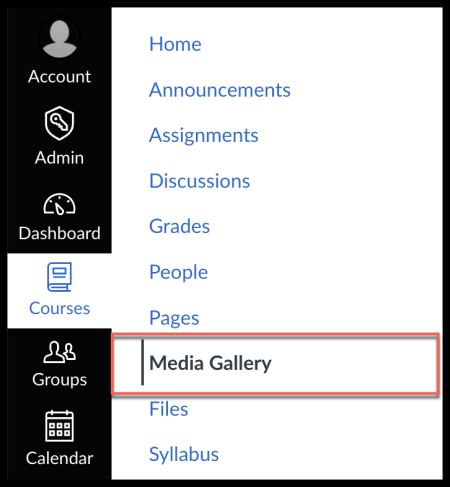
Select Create channel playlist from the Actions menu in the upper right corner.
Image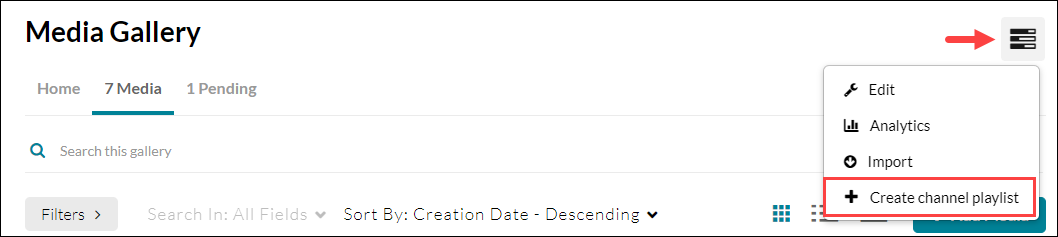
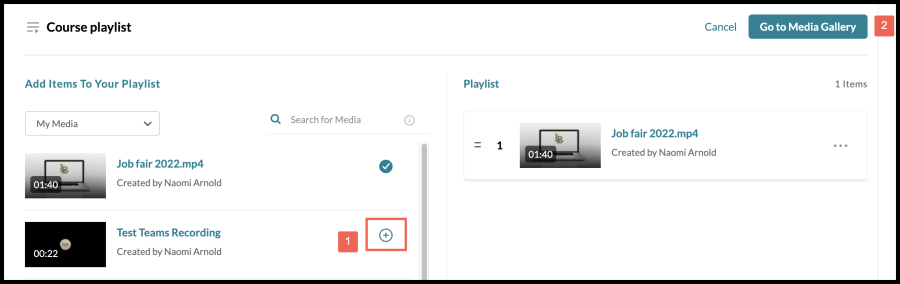
In the new playlist window, enter the Title (1), Description (2), and Tags (3).
Image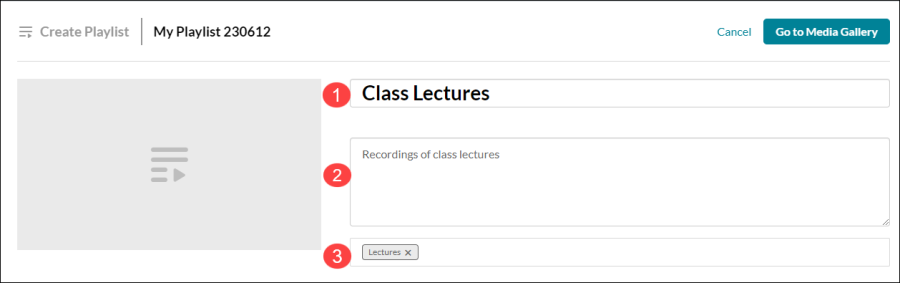
- After filling out the playlist details, scroll down and select the '+' icon for each item you wish to add to the playlist (1). A checkmark appears next to items added to the playlist.
- Re-order or remove the items in the playlist, select ellipsis to the right of a media item.
When finished, select Go to Media Gallery (2).
Image