


MediaSpace
Kaltura MediaSpace is a web-based media portal available to all CSULB faculty, staff, and students. MediaSpace is similar to YouTube, allowing users to upload video and audio files, organize them into channels and playlists, and share them privately or publically.
Create Custom Members-Only Groups
Kaltura MediaSpace users can create channels to keep media secure within CSULB-authenticated custom groups. For example, academic departments or student organizations could create their own members-only groups in which to share media.
MediaSpace Files Sync with Canvas
Kaltura MediaSpace files are synched with Canvas so instructors can easily add media directly to courses. Media uploaded to Canvas will also be automatically saved in MediaSpace for future access.
Get Started!
Access SSO
- Log into your CSULB Single Sign-On.
- Select the MediaSpace tile from the list of apps.
Access from Direct Link
- Go to the CSULB MediaSpace site.
- In the upper right corner of the homepage, select GUEST and then Login.
Image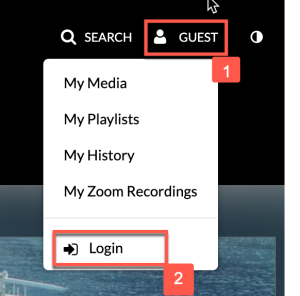
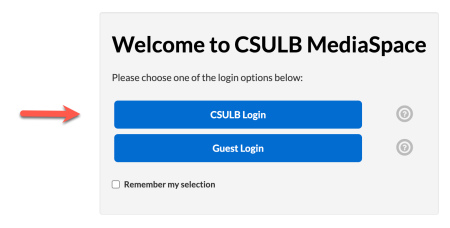
- Select the CSULB Login button.
Image
Add Media
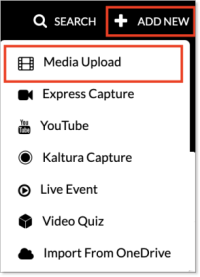
- From the MediaSpace homepage, click on Add New in the upper right corner. Select Media Upload from the drop down menu.
Image
- Drag & Drop or Choose a file to upload, locate the file on your computer. For a list of acceptable media file formats, visit the Kaltura supported transcoding formats page.
Image
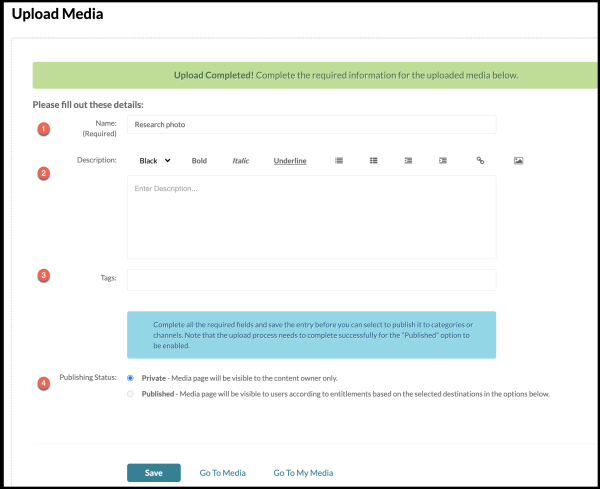
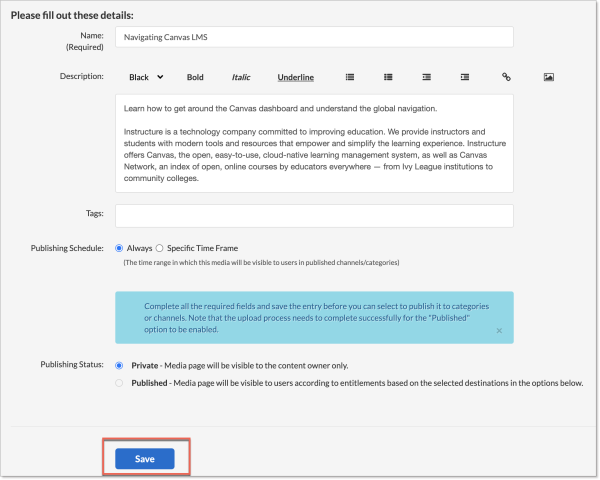
- Kaltura will display a progress bar as the file uploads. Once the media has been uploaded, you have the option to update the Name (1), Description (2), Tags (3) or Publishing Status (4).
Image
Kaltura Express Capture enables recording content directly from a browser without the need to install any additional software. The Kaltura HTML recorder allows you to use your webcam and mic to record video and audio entries directly from your browser.
- From the MediaSpace homepage, click the Add New button and select Express Capture.
- (Optional) Set the Camera or Audio Settings. The default settings are your personal computer's webcam and audio device.
- Click on the red Record Button to start the recording. A three second countdown will appear before the recording begins.
- Click the Stop button to end the recording.
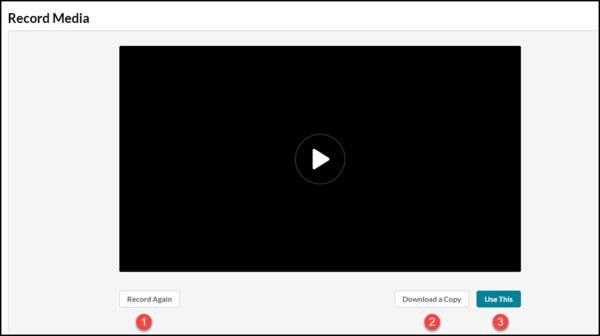
- Once the recording ends, you have the option to Record Again(1) to retake the recording, Download a Copy to your computer (2), and Use This (3) to save the recording.
Image
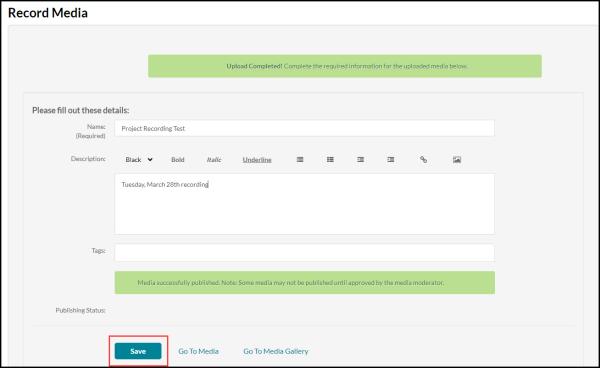
- After the upload is complete, you have the option to update the Name, Description, or Tags.
- Click Save.
For more assistance, visit the Kaltura Express Capture support page.
- Go to YouTube for the specific video you would like to add to MediaSpace.
- Under the video on YouTube, click the Share link and then click copy to save the URL to your clipboard.
- In MediaSpace, click Add New in the top right corner. Select YouTube from the drop-down menu.
Image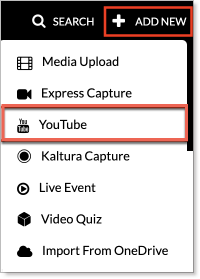
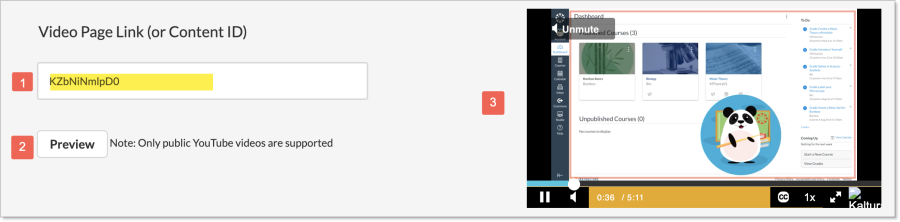
- In the Video Page Link field (1), paste the URL that you copied from YouTube. Click Preview (2) to see a preview of the video and details.
Image
- Scroll down to edit the video details to edit the Name, change the Description, add Tags, or set the Publishing schedule. Save your changes.
- Click on Add New in the top right corner. Select Import from OneDrive from the menu.
Image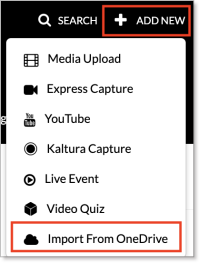
- Click the blue Select a file from your OneDrive button.
Image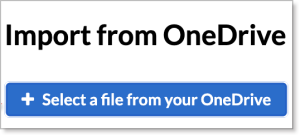
- Select the media file(s) to import, then select Open.
Image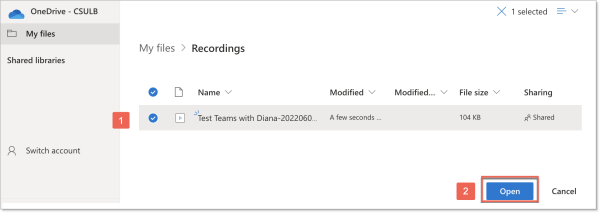
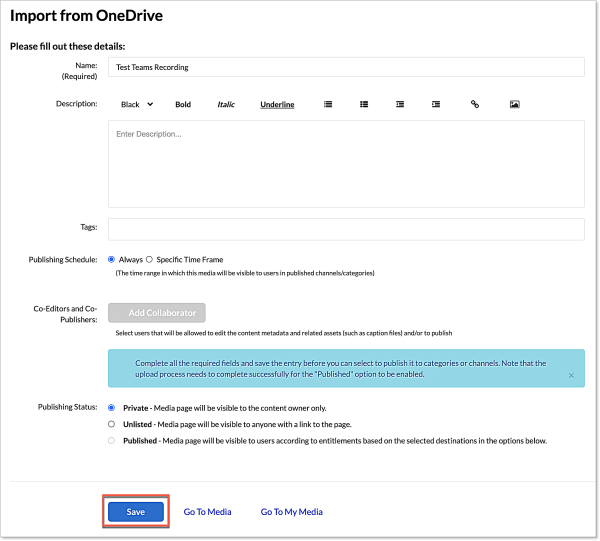
- Enter the name, description, and tags and set the publishing schedule. Save your changes.
- Select Go To Media to view the media import.
Access Your Content
Note: Only faculty and staff can create channels.
A channel is a collection of media content that pertains to a subset of users. Managers may give users permission to perform specific actions in a channel. Channel types can vary from open to private, restricted, or public to define the privacy levels by which different users may have access to view, edit, moderate, or contribute content in the channel.
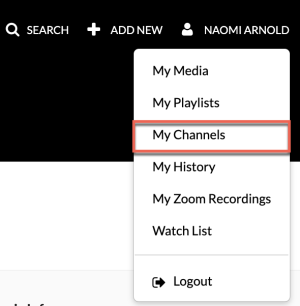
- Navigate to the upper right-hand corner of the CSULB MediaSpace. Click on your name and select My Channels from the drop-down menu.
Image
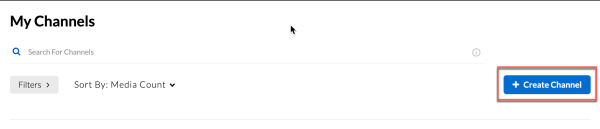
- Navigate to the right side of the screen to Create Channel.
Image
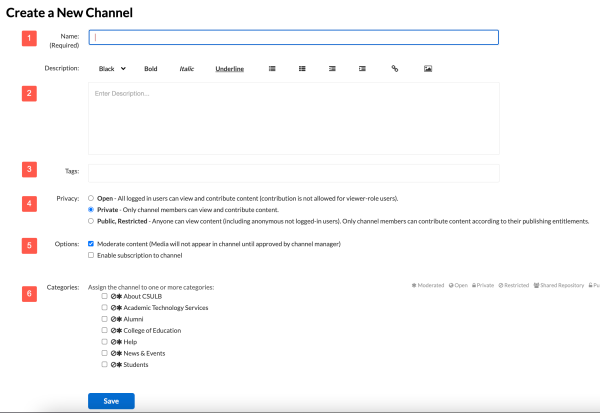
- On the Create a New Channel, give the channel a Name (1), enter a Description, if desired (2), add Tags (3), change the Privacy settings (4), enable or disable any optional settings (5), if desired, post to any permitted Category (6).
Image
For information on how to create a channel, edit a channel, enable subscriptions, etc., visit the Kaltura Channel support page.
Note: My Playlists is different from a Channel playlist.
The playlist feature simplifies navigation, allowing access to your videos in one central location rather than scrolling through a long list within the My Media content folder. In addition, they can also be shared and embedded in a course page.
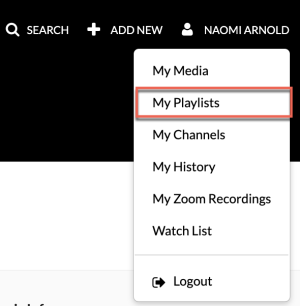
- Navigate to the upper right-hand corner of the CSULB MediaSpace. Click on your name and select My Playlist from the drop-down menu.
Image
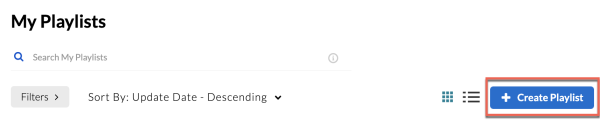
- Select the Create Playlist button to add a new playlist.
Image
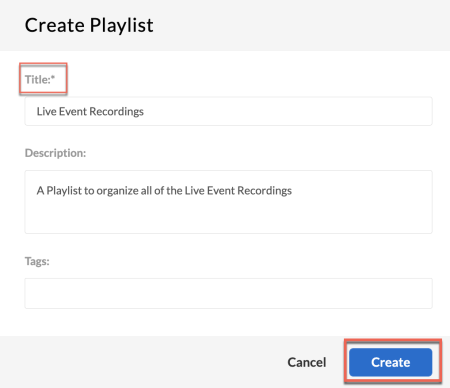
- Enter the title required for the playlist and click Create.
Image
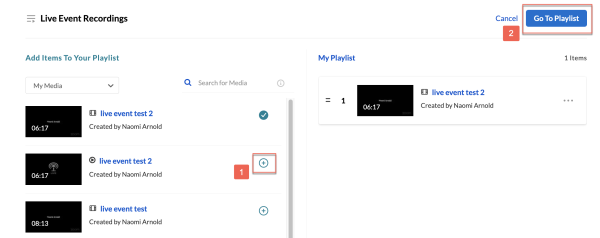
- Add items to your playlist from the left column of the page by clicking the + button (1)
- The media will be added to My Playlist on the right column of the page
- Select Go To Playlist (2) to watch your playlist, share & embed, or edit
Image
For more information, visit the Kaltura Create and Add Media to a Playlist page.
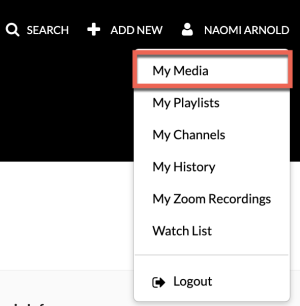
- Navigate to the upper right-hand corner of the CSULB MediaSpace. Click on your name and select My Media from the drop-down menu.
Image
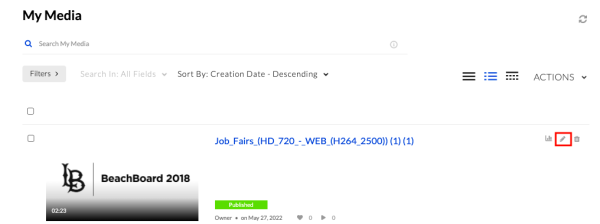
- Navigate to the media file you would like to publish and click the icon on the right of the file thumbnail.
Image

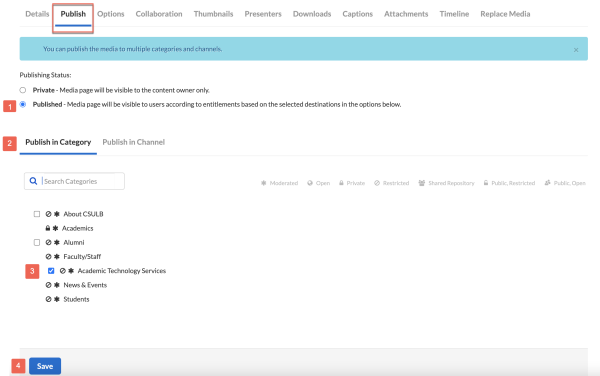
- On the Edit page, navigate to the Publish tab. From there, select Published (1)
- Under the Publish in Category (2), you can choose the Category you are entitled to publish content into (3).
- NOTE: A radio button or check box will only appear next to the name of a category or channel you have permission to publish content into.
- Be sure to save any changes you make (4).
Image
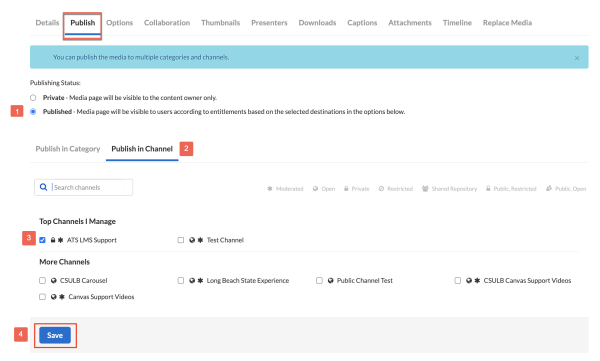
- To publish to a Channel, change the Publishing Status to Published (1), then click on the Publish in Channel (2) tab and select the channel(s) you’d like the video to be published into (3).
- Save any changes you make (4).
Image
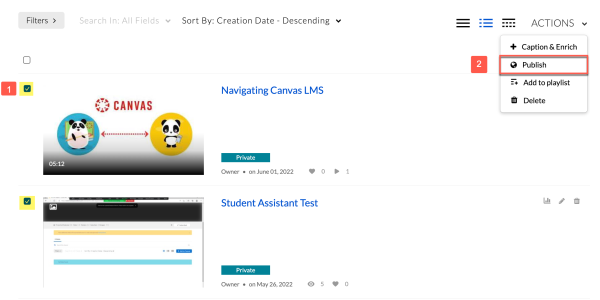
- Navigate to My Media.
- Select the checkbox to the left of the file names (1)
- Under Actions, select Publish from the drop-down menu (2)
Image
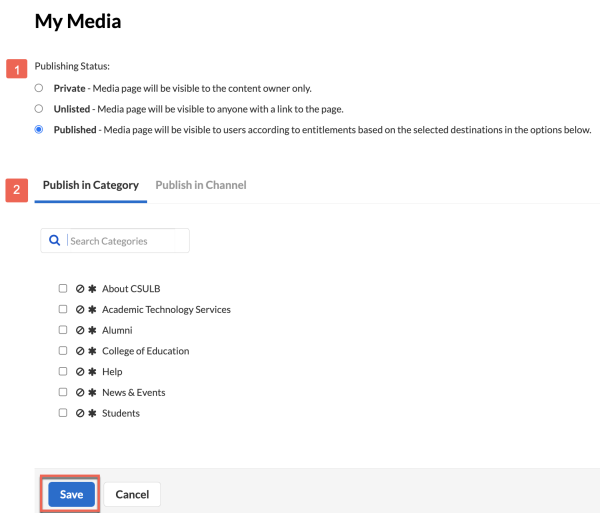
- Once directed to the Published page, change the Publishing Status to Published (1) and select the Category or Channel you’d like to publish the videos into under Publish in Category or Publish in Channel (2)
- Save any changes you make
Image
Edit Media
There two ways you can edit a media item in Kaltura:
From My Media page:
-
Click on the edit icon to the right of the video.
Within the media viewer page:
- In My Media, click on the media item's name. Within the media viewer page, click on Action below the media item and select Edit from the menu.
Image

In the Edit Media page, you can learn to edit the media's metadata, add collaborators, download media, upload & manage captions, etc., by visiting the Kaltura's Manage Media support page.
