Using MyCSULB Personal Information
The Personal Information panel of MyCSULB Student Center is where you can modify contact information, emergency contacts, preferred names, and more.

Tutorials below highlight the Desktop experience.
Please note that menus may shift to the bottom of your screen when using a mobile device.
For a general overview of all features, watch the "Navigating MyCSULB Student Center" video.
Select a feature below to learn more:
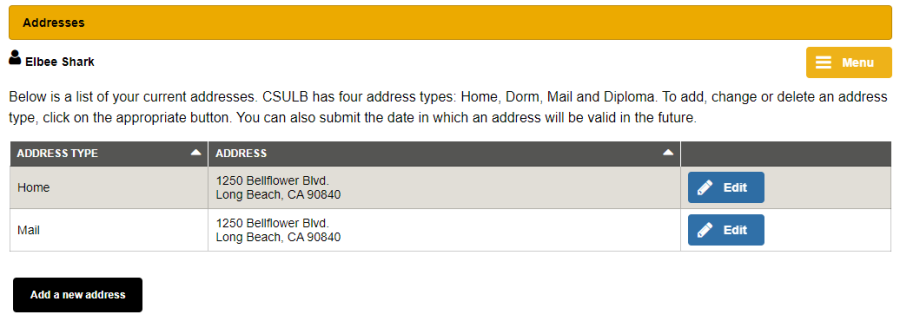
Addresses are categorized by type. Some examples of address types are home, mailing, and dormitory.
Step 1:
Locate the address that you would like to update and click on the blue link indicating the address type (i.e., Mailing Address, Home Address) under the Personal Information panel in Student Center.
Step 2 :
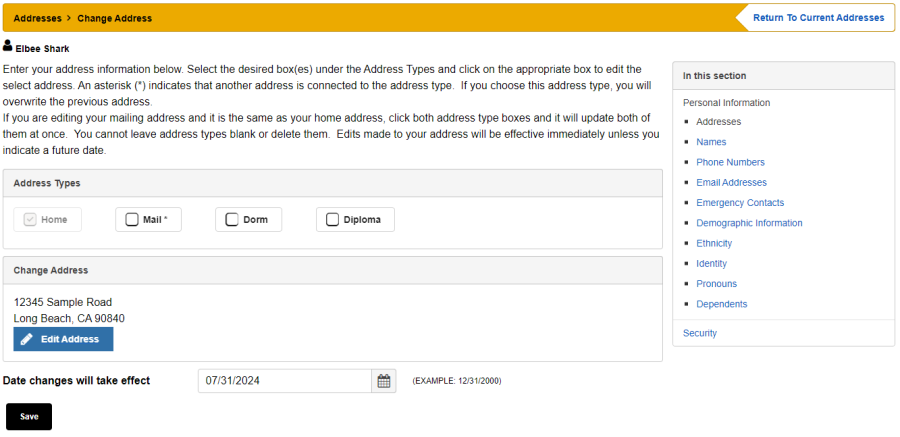
Select the address that you would like to update and click the “Edit” button. You also have the option of adding a new address by clicking on the “Add A New Address” button.
Step 3:
Update the information on the proceeding page and click “OK.” Review your changes and click “Save.” In addition, you have the ability to enter an address change that will take effect in the future; do so by entering the date that you would like the change to be effective and click “Save.”
You can provide your consent to allow CSULB to disclose confidential information from your education records to parents, spouses, or other third parties. In your MyCSULB Student Center, you can specify what information can be released and which individuals are authorized to receive this information.
View the FERPA Information Release Guide for the steps on how to update your permissions.
For more information regarding your rights and responsibilities as a CSULB student please see FERPA for Students.
Students are required to have at least one Emergency Contact listed in MyCSULB Student Center. It is recommended that students log in to MyCSULB Student Center to view or update Emergency Contacts at least once a year to make sure the information is current.
Steps to View or Update Emergency Contacts:
- Log in to MyCSULB Student Center
- Under Personal Information, select the Emergency Contact option from the featured menu on the right-side of the panel
Once on the Emergency Contacts screen, select Add an Emergency Contact to add an individual to your list. If you have more than one contact on your list, you must select a primary contact.
Image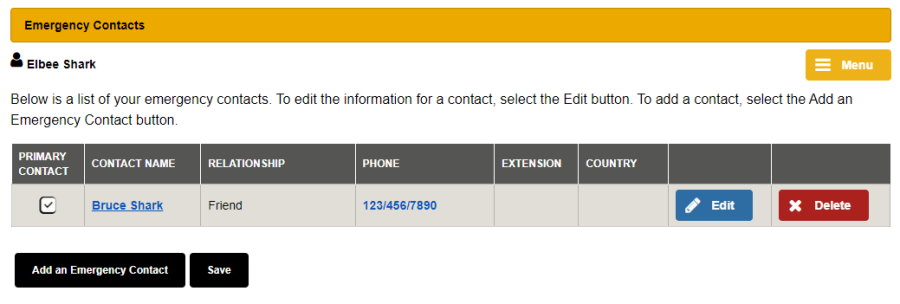
- To delete an entry, select the "Delete"button. To modify an entry, select the "Edit"button.
- Select the Save button to confirm your entries or changes.
CSULB uses email for official University notifications. As a result, all enrolled students are required to maintain a CSULB Email account and check it regularly. You can view your email account information on your MyCSULB Student Center under “Personal Information.” You are responsible for ensuring this information is accurate and up-to-date. Failure to do so may result in missing important information!
If you do not have a current email account, visit the Campus Technology Help Desk or call (562) 985-4959.
Note: CSULB understands that the use of a name is not a preference, and that a First Name of choice should be used where possible in the course of university business and education. However, First Names cannot be used for purposes of misrepresentation or contain foul/inappropriate language.
- Log in to MyCSULB Student Center and click on the "Names" link on the right-side menu under the "Personal Information" panel.
- Select the "Edit" icon located on the "Preferred" row under the "Request Change" column of the table. Follow the instructions on the next page to request a Preferred First Name.

The processing time is approximately 3 business days. You will receive a confirmation email once your First Name request has been approved and updated in the system. Your email address will also be updated to match your updated first name.
All printed diplomas will feature a student’s Primary Name unless otherwise specified in MyCSULB Student Center. To view your Primary Name, log into MyCSULB Student Center and view under Personal Information.
If you would like a different name listed on the diploma, follow the steps below before the last day of the semester you intend to graduate:
- In MyCSULB Student Center, under the "Personal Information" section, select the Names link from the right-side menu.
Your current preferred names will display in the featured table. To add a new Diploma Name, select "Diploma" from the Name Type drop-down menu at the bottom of the page. Then, select the "Add" button.
Image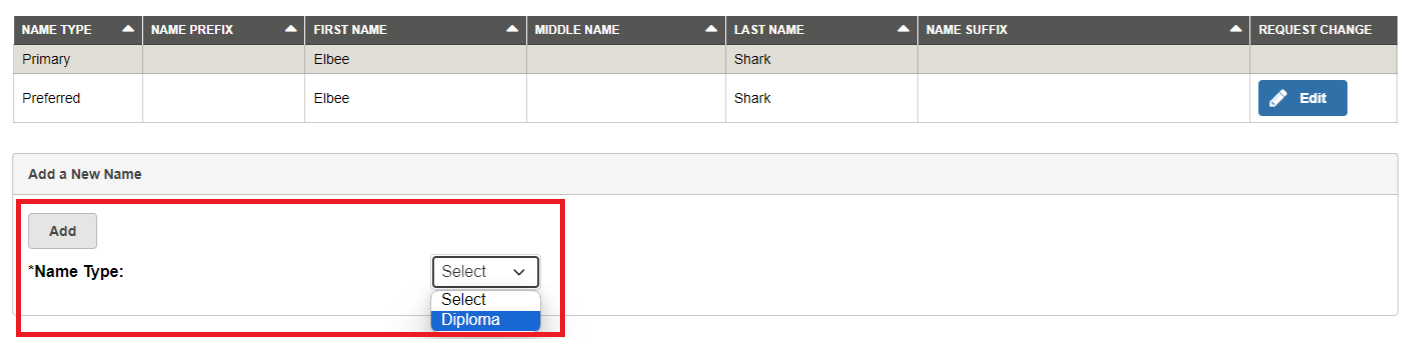
You may then request a different First or Middle Name to be printed on your diploma. All requests are reviewed for approval. Select the "Save" button to confirm your request.
Image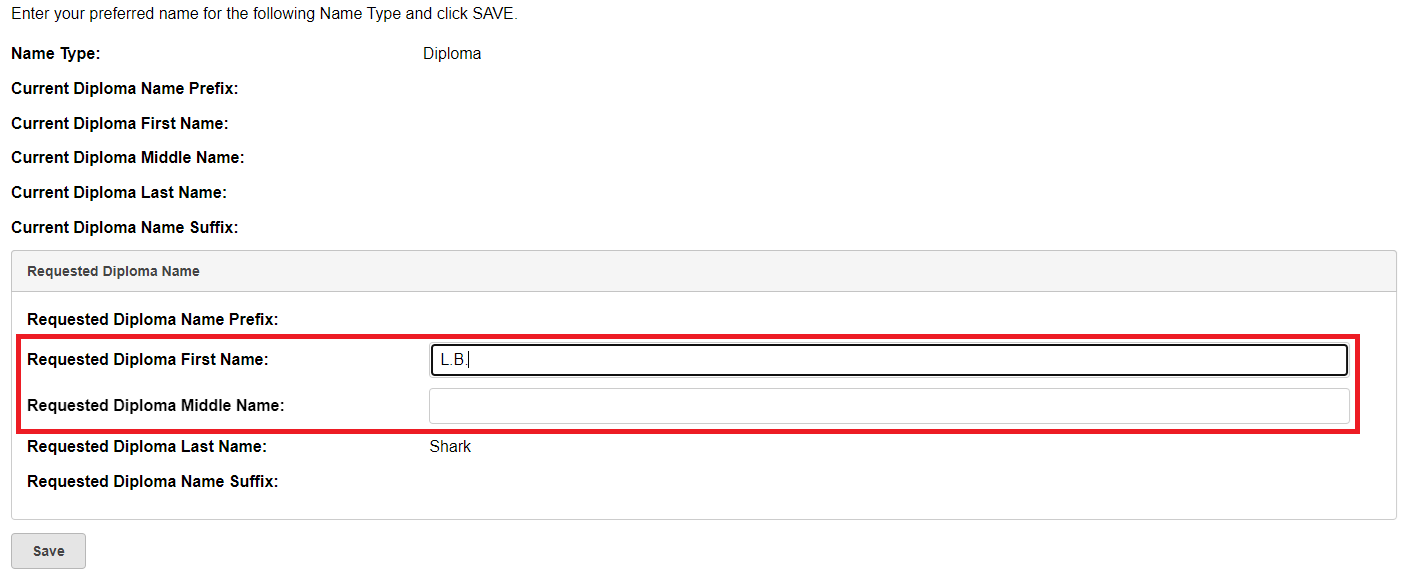
- To request a a Diploma Last Name (that is different than your Primary Last Name), please complete and submit a Request to Change Diploma Last Name (DocuSign).
Students have the opportunity to identify the pronouns by which they want to be referred. The university reserves the right to reject requests for pronouns that contain foul or inappropriate language, represent intentional misuse of this system, or are used for purposes of misrepresentation or academic misconduct.
Step 1:
In the Personal Information section, select Pronouns from the expandable menu (button is located in the upper right of the panel, illustrated with three stacked lines).
Step 2:
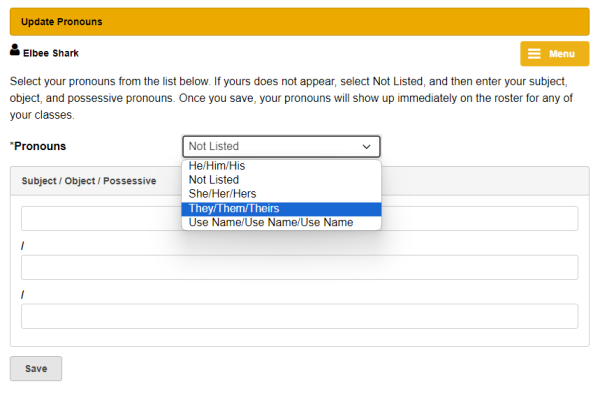
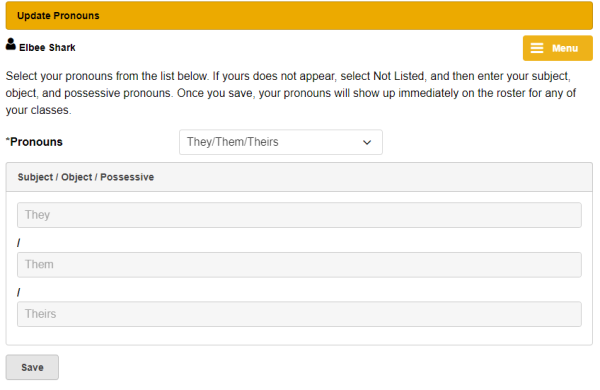
Select your Pronouns from the dropdown list.
- He/Him/His
- She/Her/Hers
- They/Them/Theirs
- Use Name/Use Name/Use Name
- Not Listed – Enter your pronouns (subject/object/possessive)
Note: There are restrictions on what will be accepted as a student’s pronouns. The university reserves the right to reject requests for pronouns that contain foul or inappropriate language, represent intentional misuse of this system, or are used for purposes of misrepresentation or academic misconduct.
Step 3:
Select the “Save” button.
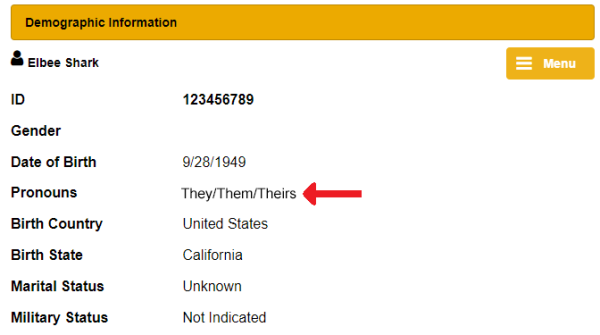
Your declared pronouns can be viewed anytime in the Personal Information section of your Student Center via the Demographic Data link (right-hand side featured menu). FYI: Instructors will be able to view your declared pronouns when viewing their Class Roster (sample pictured below).
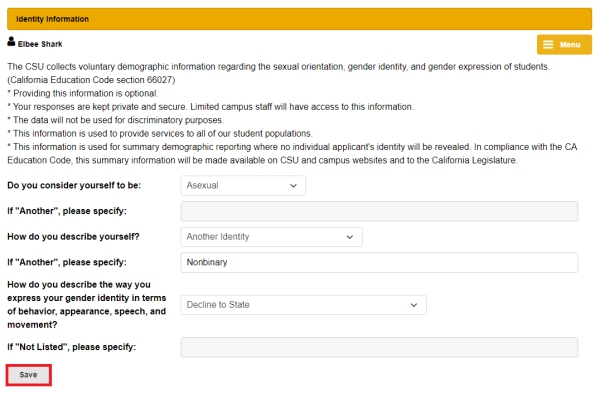
Students have the option to share their gender and sexual orientation identities under the "Identity" settings within the expandable menu options in the Personal Information panel.
Step 1: Expand the menu options under Personal Information and select "Identity"

Step 2: Answer the prompts accordingly. Students who wish to opt out of responding to any questions may select "Decline to State."
Step 3: Hit "Save" when finished.
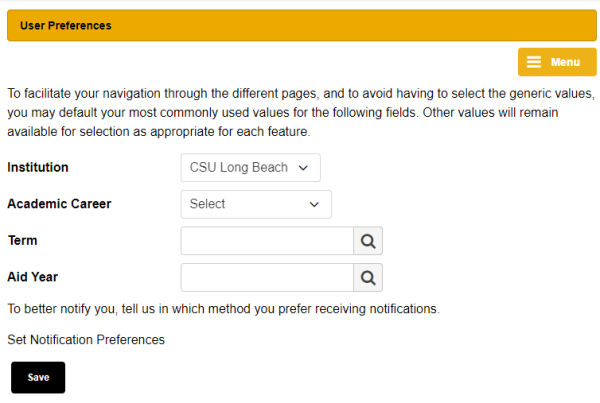
User Preferences are established to assist you with navigation through your MyCSULB pages. The values that you can set are Institution, Academic Career, Term, and Aid Year. Institution was established at the time your MyCSULB account was created. By updating your Career, Term, and Aid Year, you will not have to enter the data each time you display a new menu. Remember to update these values when a new term is in session or a new Financial Aid Year has begun.
Step 1:
Click on the “User Preferences” link under the Personal Information section in the Student Center.
Step 2:
Select the parameters for your User Preferences and click “Save.”
The CSU collects voluntary demographic information regarding the sexual orientation, gender identity, and gender expression of students. (California Educational Code section 66027).
- Providing this information is optional.
- Your responses are kept private and secure. Limited campus staff will have access to this information.
- The data will not be used for discriminatory purposes.
- This information is used to provide services to all of our student population.
- This information is used for summary demographic reporting where no individual applicant’s identity will be revealed. In compliance with the CA Education Code, this summary information will be made available on CSU and campus websites and to the California Legislature.
Step 1:
In the Personal Information section, select “Identity” from the Personal Information expandable menu (button is located in the upper right of the panel, illustrated with three stacked lines).
Step 2:
Make your selections or update your previous selections by selecting one response from the drop down menu for each question. If “Another” is selected from the drop down menu, the box beneath the drop down menu will allow you to input your response.
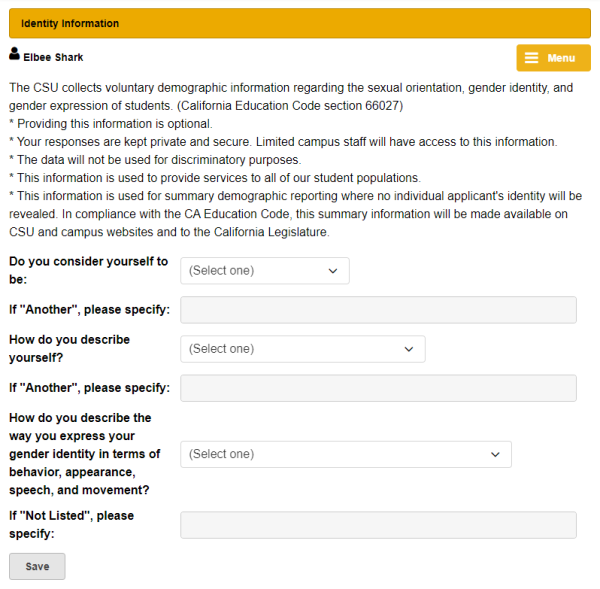
Step 3:
Once your selections have been made, click the Save button.