


Student Resources
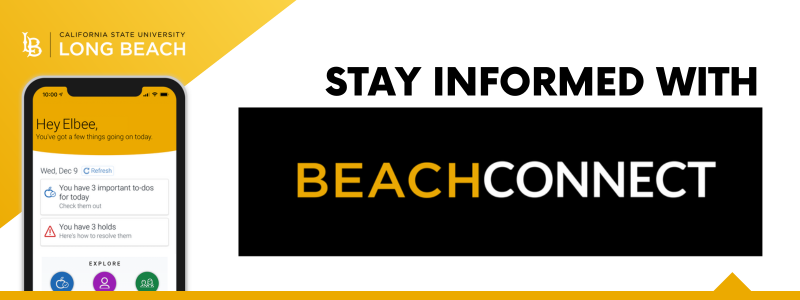
Did you know you can access Beach Connect without logging into SSO? Download the Beach Connect App on your phone! Through the Beach Connect App, student can:
- Find availability and schedule appointments for advising, tutoring, Beach Central (financial aid, graduation, academic appeals), and more
- Check for holds and find out how to remove them
- Get reminders about to-dos and upcoming deadlines
- Get connected with classmates for study groups
- Connect with academic support resources
Download

Instructions for Students

1. Download the app to your iPhone or Android phone from your phone's app store.
Use the following links to download the app or search for “Navigate Student” in your phone's app store.
Download for iPhone
Download for Android
If you do not have a compatible phone, you may access the Navigate app on your computer through the Desktop Login.

2. Once the app has finished downloading to your phone, open it. Select the “Type here to search” field to continue.
You will only need to complete this step the first time you open the app.

3. In the search field, enter “California State University - Long Beach.” A link with the university's name will appear. Select the link to continue.

4. Enter your CSULB email address and your password for CSULB Single Sign-On to log in.
You will only have to select the university and enter your account information the first time you use the app. The next time you open the app, you will skip this step.
If your BeachID account information does not work, please contact the Technology Help Desk for login assistance.

5. Choose whether to allow notifications from the app.
If you would like to receive notifications about important deadlines, please select “Allow.” We recommend that you allow notifications to help you stay up to date with information about your student record. Otherwise, please be sure to check the app frequently.

6. The first time you log in, you will need to complete an Intake Survey. Complete the survey to continue.
The survey has three questions and you may select as many answers as apply to you for each question. These answers will help us personalize your app experience.

7. Your home page will appear.
If you have any pending to-dos or holds, they will appear at the top of this page. Select the buttons to use different features of the app.
The next time you open the app, you will see this page automatically and will not need to log in again.
If you have not satisfied a university requirement or condition, a hold may be placed on your student record that may restrict access to certain services, such as registering for and dropping classes. When a hold is placed on your record, it appears on MyCSULB Student Center and now on your Beach Connect mobile app too!
The Holds feature provides a convenient way to check for any holds on your student record. If you have a hold on your record, it will appear on your home page.
1. To review more details about your holds, select the Holds button on your home page.

2. Your “Holds” page will show you all active holds on your record. Select a hold to get more information.

3. Each hold will include a description and information about how to resolve the hold.
Follow the instructions to remove the hold. Once you have satisfied the requirement or condition to remove the hold and the university has processed the update, your hold will be removed from your record and will no longer appear on MyCSULB Student Center or your Beach Connect mobile app.
Select the back arrow at the top of the page to navigate back to previous pages.
The To-Dos feature provides a convenient way to get customized reminders about to-dos and upcoming deadlines. The university may require or recommend that you complete certain tasks to help you meet your educational goals. You can mark To-Dos as complete as you finish them. If you have any required to-dos and/or deadlines within the next seven days, an alert will appear on your home page.
1. To review your to-dos, select the To-Dos button on your home page.

2. Your “To-Dos and Events” page will show you deadlines within the next seven days. Select a to-do or deadline to get more information.
You can find your overdue to-dos by selecting the funnel icon at the top of the page.
To review future deadlines, you may select the “Show To-Dos from…” button at the end of the list.

3. When you select a to-do, more details will appear.
Each to-do will include instructions and additional resources to help you.
You may check the box next to the to-do name to mark it as completed. However, please note that if the to-do requires processing by the university, it must be processed and your student record updated before the to-do is officially considered completed.

4. When you select a deadline, more details will appear.
You can select the “Add to Calendar” button to add the deadline to your phone's calendar.
Each deadline will include a description and, if action is required, additional resources to help you.

5. You may select links in the “Helpful Resources” section to find contact information for each resource.
You may favorite a resource by selecting the heart icon at the top of the screen.
6. When you are done, select the back arrow at the top of the page to navigate back to previous pages.
You can schedule appointments using the Appointments feature. Appointments can be scheduled for:
- Academic Advising
- Academic Coaching
- Beach Central (Financial Aid, Graduation, Academic Appeals)
- First Year Beach Connections
- Tutoring
- Veterans Services
- Writing Center
1. To schedule an appointment, select the Appointments button on your home page.

2. Your “My Appointments” page will show you any upcoming appointments that have already been scheduled. Select the Schedule an Appointment button to continue.

3. Choose “Select” next to the “What type of appointment would you like to schedule?” question.

4. Choose the reason for your appointment and then select the Answer Next Question button.
Depending on the reason you select, additional questions may appear to help you be more specific. Answer each question to continue.

5. When you’ve finished answering questions for your appointment reason, select the Continue to Location & Staff button.

6. On the Location & Staff page, choose “Select” next to “Pick a location for your appointment.”

7. Choose the location for your appointment and then select the Answer Next Question button.

8. Choose a staff member to schedule your appointment with and then select the Done for Location and Staff button.
Depending on your appointment reason, you may be able to select more than one staff member. If you select more than one staff member, you will be able to view available appointments for multiple staff members.

9. Review your answers and then select the Continue to Next Step button.

10. On the Available Times page, review the available appointment dates. To review available times for each date, select a date. Then, choose a time for your appointment. Select the Continue to Next Step button.
For more options, you can select the Next Week button to review future appointment availability.
You may also find information about drop-in availability by selecting the View drop-in times button.

11. Your appointment details will appear. Review the details and select the Confirm Appointment button to finish scheduling your appointment.
If you need to make any changes to your appointment, select the back arrow before you confirm your appointment.
If you need to reschedule your appointment or if you wish to cancel, you can do so using the Appointments feature.
1. To cancel or reschedule an existing appointment, select the Appointments button on your home page.

2. Your “My Appointments” page will show you any upcoming appointments that have already been scheduled. Select the name of the appointment you wish to cancel.

3. At the bottom of the appointment information, select the Cancel Appointment button.
You will have the option to reschedule after selecting the Cancel Appointment button.

4. Select a cancelation reason from the dropdown menu.
Then, you may optionally add a comment in the text box to provide additional details about your cancelation.

5. Select the Cancel Appointment button.

6. If you want to reschedule your appointment, select the Reschedule button.
Otherwise, select the back arrow to return to your “My Appointments” page.
The Class Schedule feature allows you to review information about your classes.
1. To review your class schedule, select the Class Schedule button on your home page.
You may favorite a resource by selecting the heart icon at the top of the screen.

2. To review classes for a different term, select the funnel icon at the top of the page and select the semester.
You will only be able to review the current term and the next term you are registered for in Beach Connect. To find all of your upcoming terms, visit your MyCSULB Student Center.

3. Select the Schedule View tab to review your classes in a schedule format.
You can select the “Add All Courses to Calendar” button to add your class schedule to your phone's calendar.

4. You can select each class to view more information, including its description, time, and instructor name.
Select the back arrow at the top of the page to navigate back to the list of classes.
